
Please note: This website contains affiliate links. As an Amazon Associate, we earn from qualifying purchases at no additional cost to you.
.
If you’ve been hanging around Idea Factory for a while, you probably know I’ve become a little obsessed with swapping everyday products for simpler, more natural ingredient-conscious alternatives.
I’ve been on this kick for about a year and a half now, and my latest DIY project is one I’m especially excited about: homemade shampoo bars. They’re small, convenient, and don’t require another big plastic bottle sitting in the shower.
And the best part? You don’t need to make traditional soap or work with lye to create them.
These DIY shampoo bars use a combination of gentle cleansing ingredients, cocoa butter, and a little conditioning wax to create solid shampoo with a creamy lather. They’re also surprisingly straightforward to make once you’ve gathered your ingredients.
Why You’ll Love These Homemade Shampoo Bars
There are quite a few reasons to give solid shampoo a try.
- Less plastic packaging. One more opportunity to cut back on plastic bottles in the bathroom.
- No lye required. Unlike traditional soapmaking, this recipe doesn’t involve handling sodium hydroxide.
- Compact and convenient. Shampoo bars are wonderful for traveling and small bathrooms.
- Ingredients you choose. You know exactly what’s going into your shampoo.
- A fun DIY beauty project. Especially if you’ve already started making your own bath and body products.
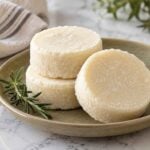
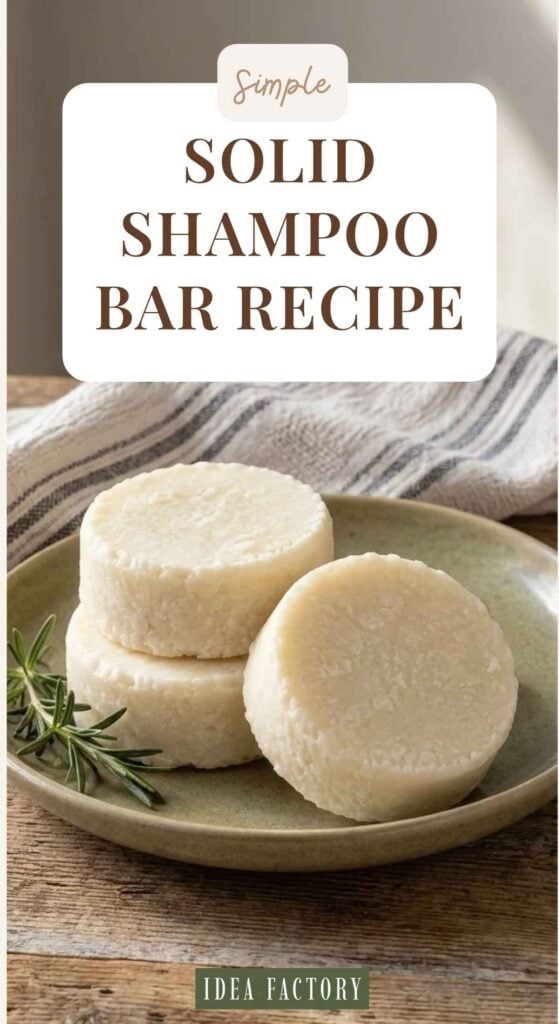
And honestly, I love the way a few little handmade shampoo bars look sitting on a pretty ceramic dish. Much nicer than a row of mismatched plastic bottles.
What’s the Difference Between Shampoo Bars and Soap Bars?
Although they look similar, shampoo bars and traditional soap bars aren’t quite the same thing. Traditional soap is made by combining fats or oils with lye. The finished soap is generally alkaline, which isn’t always ideal for hair.
The shampoo bars we’re making are called syndet bars, short for synthetic detergent bars. Don’t let the name scare you off! They use cleansing ingredients called surfactants, similar to those found in liquid shampoo, but they’re made into a solid bar instead. One of the main ingredients is sodium cocoyl isethionate, commonly called SCI. It’s a coconut-derived cleanser that produces a lovely, creamy lather. Syndet bars can also be formulated at a pH that’s more suitable for hair and scalp than traditional soap.
DIY Shampoo Bar Ingredients
This recipe makes 100 grams of shampoo bar mixture, which you can divide into smaller bars using a silicone mold. For the best results, measure everything with a digital scale rather than using teaspoons or tablespoons.
Ingredients
I’ve included links to each product on Amazon, so you can easily grab them!
| Ingredient | Amount | What It Does |
|---|---|---|
| Sodium Cocoyl Isethionate (SCI) | 43 g | Creates a gentle, creamy cleansing lather |
| Sodium Lauryl Sulfoacetate (SLSA) | 19 g | Adds foam and cleansing power |
| Cocamidopropyl Betaine | 23 g | Helps with lather and binds the ingredients |
| BTMS-25 | 4 g | Adds conditioning properties |
| Cocoa Butter | 5 g | Helps give the bars firmness |
| Hydrolyzed Wheat Protein | 4 g | Provides additional hair-conditioning benefits |
| Orange Essential Oil | 1 g | Adds a light citrus fragrance |
| Geogard ECT Preservative | 1 g | Helps protect against microbial growth |
| Total | 100 g |
A note about this formula: The ingredient proportions are based on the SCI shampoo bar developed by Angela Wills at Savvy Homemade. You can see her original tutorial here.
A Few Ingredient Notes
- SCI and SLSA: These are the cleansing ingredients that make the shampoo lather. Both are available from cosmetic ingredient suppliers. Despite the similar names, SLSA isn’t the same ingredient as sodium lauryl sulfate (SLS).
- Cocamidopropyl Betaine: This liquid ingredient helps the powdered cleansers come together and contributes to the finished lather.
- BTMS-25: A conditioning ingredient that can make the shampoo feel a little nicer on your hair. Be sure you’re buying BTMS-25 rather than BTMS-50. They’re different ingredients and shouldn’t be swapped gram for gram.
- Cocoa Butter: Helps the bars hold their shape while adding a creamy feel.
- Preservative: This is one ingredient you don’t want to leave out. Shampoo bars are exposed to water during use, and preservation needs to be appropriate for the complete formula.
Supplies You’ll Need

Round Silicone Molds
Shop on Amazon
$8.49
Great for your DIY beauty and self care products like homemade soap and shampoo bars.
10/09/2026 11:25 pm GMT
You don’t need an elaborate soapmaking setup, but a few basic supplies will make the process easier.
- Digital scale accurate to at least 0.1 gram
- Heat-resistant mixing bowls or measuring cups
- Silicone spatula
- Double boiler or a heat-safe container over gently simmering water
- Small silicone molds – I like these
- Thermometer
- Suitable respiratory protection and safety glasses
- Gloves
- Appropriate pH-testing supplies
Best Seller

Digital Pocket Gram Scale | High Precision with 100g Calibration
Shop on Amazon
$11.99
10/09/2026 11:22 pm GMT
Safety tip: SCI and SLSA are fine powders that can become airborne when you’re measuring or mixing them. Work in a well-ventilated area, avoid creating dust, and use respiratory and eye protection appropriate to the supplier’s safety guidance. Keep your equipment clean, dry, and dedicated to cosmetic projects where practical.
How to Make DIY Shampoo Bars
Once everything is measured, the actual mixing process is fairly straightforward. The mixture will be much thicker than liquid shampoo. Think soft dough or a thick paste rather than something you can pour.
Step 1: Measure the Powdered Ingredients
- Put on your protective equipment before opening the powdered surfactants.
- Using your digital scale, measure: 43 g SCI and 19 g SLSA
- Place both ingredients in a heat-resistant mixing bowl.
- Stir carefully to distribute the powders without creating airborne dust.
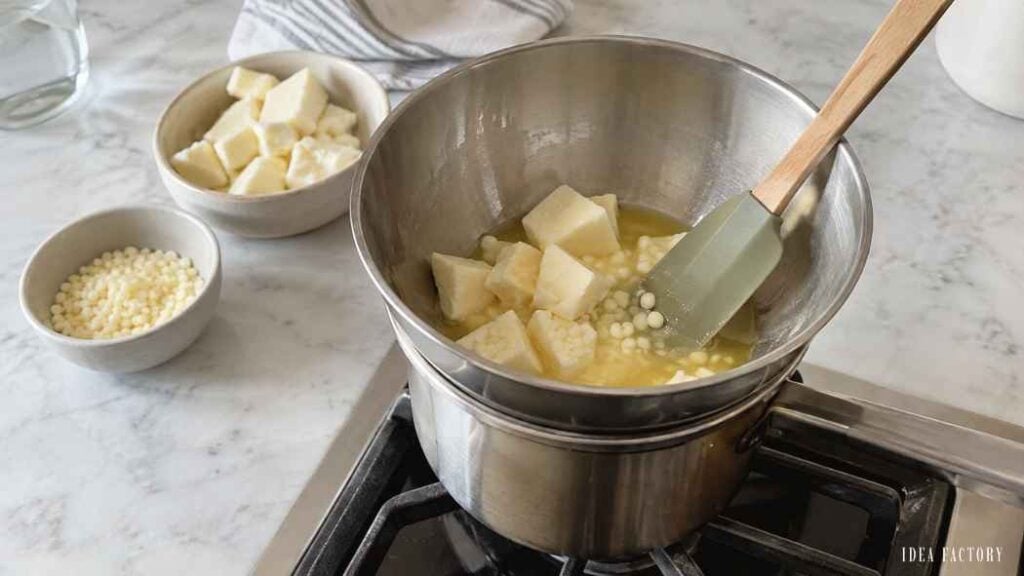
Step 2: Melt the Cocoa Butter and Conditioning Wax
- In a separate heat-resistant container, combine:
- 5 g cocoa butter
- 4 g BTMS-25
- Gently heat them using a double boiler until fully melted.
- Stir occasionally to help everything melt evenly.
- Avoid overheating the mixture.
Step 3: Combine the Liquid Ingredients
In another small container, measure:
- 23 g cocamidopropyl betaine
- 4 g hydrolyzed wheat protein
- 1 g orange essential oil
- 1 g Geogard ECT preservative
Combine the ingredients thoroughly, following the preservative manufacturer’s instructions for processing temperature and compatibility.
Important: Before making the batch, confirm that your specific Geogard ECT product is suitable for this formula and that its recommended use level includes 1%. Don’t substitute a different preservative without reviewing the formula.
Step 4: Mix the Wet and Dry Ingredients
- Slowly add the liquid mixture to the bowl containing the SCI and SLSA.
- Stir carefully with a spatula.
- The powders will begin absorbing the liquid, creating a thick, somewhat crumbly mixture.
- Keep mixing until the ingredients are evenly distributed.
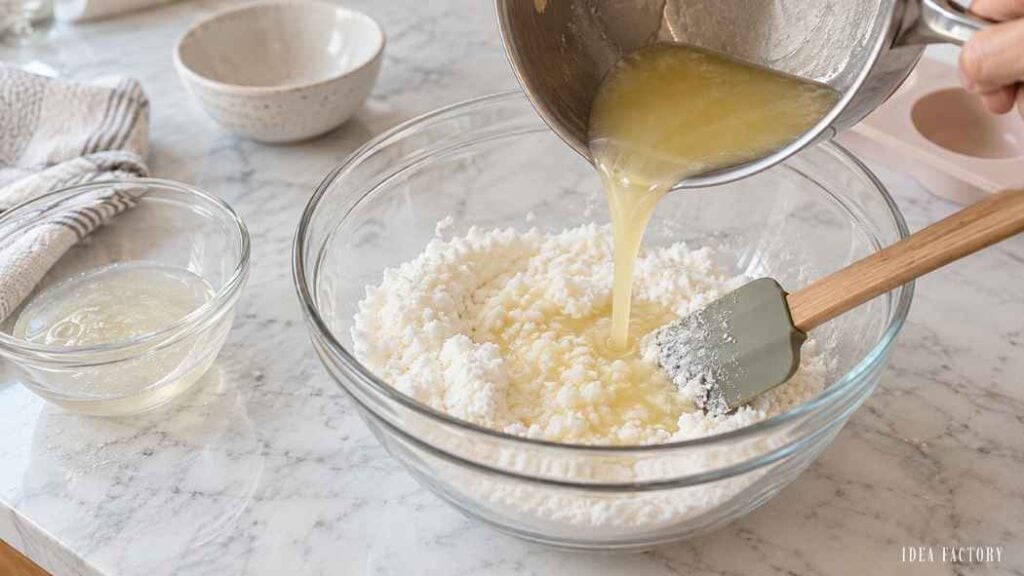
Step 5: Add the Melted Cocoa Butter Mixture
Pour the melted cocoa butter and BTMS-25 into the surfactant mixture. Stir thoroughly until everything comes together – you’re looking for a thick, cohesive paste that can be pressed into molds.
Quick note: It won’t look perfectly smooth, and that’s fine. Handmade shampoo bars often have a slightly rustic texture.
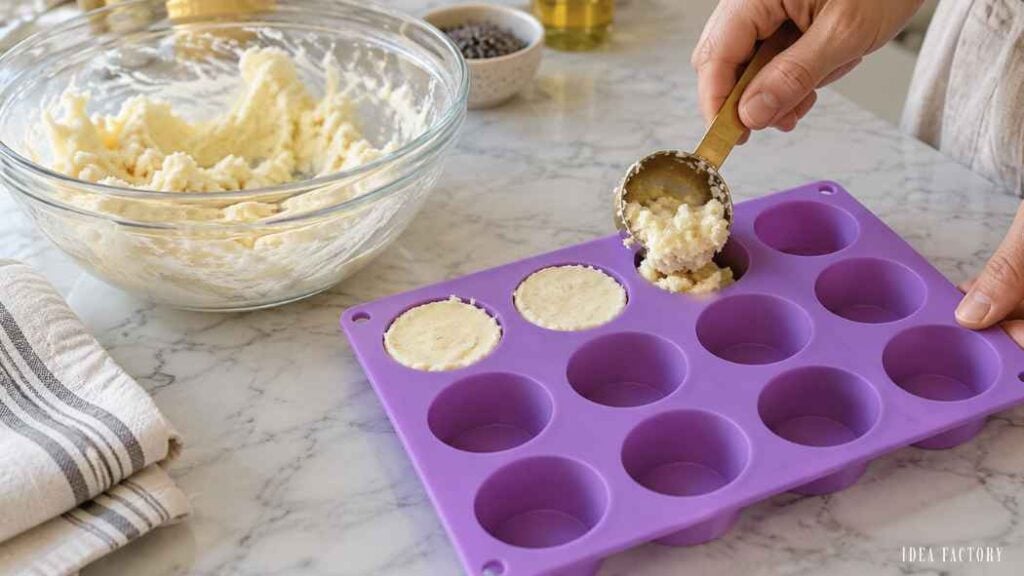
Step 6: Press the Mixture Into Silicone Molds
- Spoon the shampoo mixture into your silicone molds.
- Press firmly with the back of a spoon or spatula, making sure the mixture reaches the bottom and sides of each cavity.
- You want to avoid leaving large air pockets.
For this project, I love using small round silicone molds rather than making one oversized shampoo bar. They’re easier to hold, and you can keep a couple tucked away until you’re ready to use them.
Yield: One 100-gram batch makes approximately three 33-gram bars, depending on your mold size and how much mixture is lost during preparation. If you’re using smaller cavities, you may get additional bars.
Step 7: Let the Bars Firm Up
Place the filled mold in the freezer for approximately 30 minutes, or until the bars are firm enough to remove without breaking.
Carefully unmold them and place them on a clean, dry surface with good airflow. Allow several days for additional hardening. The original formulator of this recipe prefers approximately one week to help the bars become firmer and last longer during use.
Hardening time isn’t a substitute for confirming the formula’s pH, preservation, or suitability for use.
How to Use a Homemade Shampoo Bar
Once your bars are properly prepared and you’ve confirmed the formula’s suitability for use, they’re easy to incorporate into your shower routine.
- Wet your hair thoroughly.
- Wet the shampoo bar.
- Rub the bar between your hands to create a lather.
- Massage the lather into your scalp and hair.
- Rinse thoroughly.
- Follow with conditioner if needed.
You can also gently glide the wet bar over your hair, but I find working up the lather in your hands is a little less messy. Afterward, place the bar on a draining soap dish.
The secret to keeping shampoo bars from turning mushy is letting them dry between uses. Don’t leave them sitting in a puddle of water! 🙂
Tips for Making Shampoo Bars at Home
- Measure by weight. Cosmetic formulas depend on accurate measurements. A digital scale is essential.
- Don’t substitute ingredients casually. SCI, SLSA, BTMS-25, and BTMS-50 all serve different purposes. Changing them can affect the finished bar.
- Follow preservative instructions. Different preservatives have different recommended concentrations, temperature limits, and pH ranges.
- Check the finished pH. Shampoo bars should be evaluated using an appropriate dilution and testing method. The pH of an individual ingredient doesn’t establish the pH of the finished product.
- Give the bars time to harden. Firm bars are generally easier to handle and store.
- Keep them dry between uses. A draining soap dish is your best friend.
- Start with a small batch. There’s no need to make a dozen shampoo bars until you’ve confirmed that you like the formula.
DIY Shampoo Bar: Frequently Asked Questions
Can you make shampoo bars without lye?
Yes. This recipe uses surfactants rather than traditional soapmaking ingredients, so you don’t need to handle lye.
Are DIY shampoo bars natural?
Not entirely. Some ingredients are derived from plant-based materials, but the cleansing agents are manufactured cosmetic ingredients. Homemade doesn’t automatically mean natural, and natural doesn’t automatically mean safer.
Are these shampoo bars sulfate-free?
The listed formula uses SCI and SLSA rather than sulfate surfactants such as sodium lauryl sulfate. However, always check the complete specifications of the ingredients you purchase.
How long does a homemade shampoo bar last?
That depends on the size of the bar, how often you wash your hair, and how well you store it. Smaller bars will naturally be used up faster than larger ones.
Do homemade shampoo bars need preservatives?
Many do, especially when they contain water-bearing ingredients or are repeatedly exposed to moisture. This recipe includes a broad-spectrum preservative, but the finished formula’s preservation still needs to be appropriate and effective.
Can I leave out the essential oil?
You shouldn’t simply omit an ingredient from a percentage-based cosmetic formula without accounting for the change. If you prefer fragrance-free shampoo bars, look for a formula specifically developed without fragrance.
Can I use these shampoo bars on color-treated hair?
That depends on the finished formula’s pH and cleansing characteristics, as well as your hair and color treatment.
A Little Less Plastic, One Product at a Time
One thing I’ve learned since I started trying to reduce plastic in our everyday routines is that small changes really do add up.
You don’t have to replace everything in your bathroom overnight. Sometimes it’s just about finding one product you enjoy making yourself.
And shampoo bars are a fun place to experiment. They’re compact, don’t require another plastic bottle, and look pretty darn cute sitting on a little ceramic dish.
Just remember that homemade beauty products still need to be formulated carefully. Using an established recipe, measuring accurately, and following the ingredient suppliers’ guidance makes the process much more reliable than guessing.
Other Popular DIY Self Care Recipes
- DIY Hair Masks 101: Simple At-Home Treatments for Healthier Hair
- Natural Lip Balm Recipe | DIY for Dry Chapped Lips
- Glow Up at Home: 4 DIY Face Masks with Natural Ingredients
- Goodbye Frizz: DIY Hair Mask for Frizzy Hair
Recipe Credit
This DIY shampoo bar tutorial uses the ingredient formulation originally developed by Angela Wills of Savvy Homemade. The preparation instructions and article commentary have been independently written for Idea Factory.
Please note: This website contains affiliate links. As an Amazon Associate, we earn from qualifying purchases at no additional cost to you.
.