
Please note: This website contains affiliate links. As an Amazon Associate, we earn from qualifying purchases at no additional cost to you.
.
If you’re looking for a homemade gift that’s genuinely useful, endlessly customizable, and impressively easy to make — DIY coasters check every single box.
They’re practical, they look beautiful, and they cost almost nothing to make. A set of four coasters wrapped in kraft paper and tied with a ribbon is a gift anyone would be happy to receive — teachers, coworkers, neighbors, parents, the person who has everything.
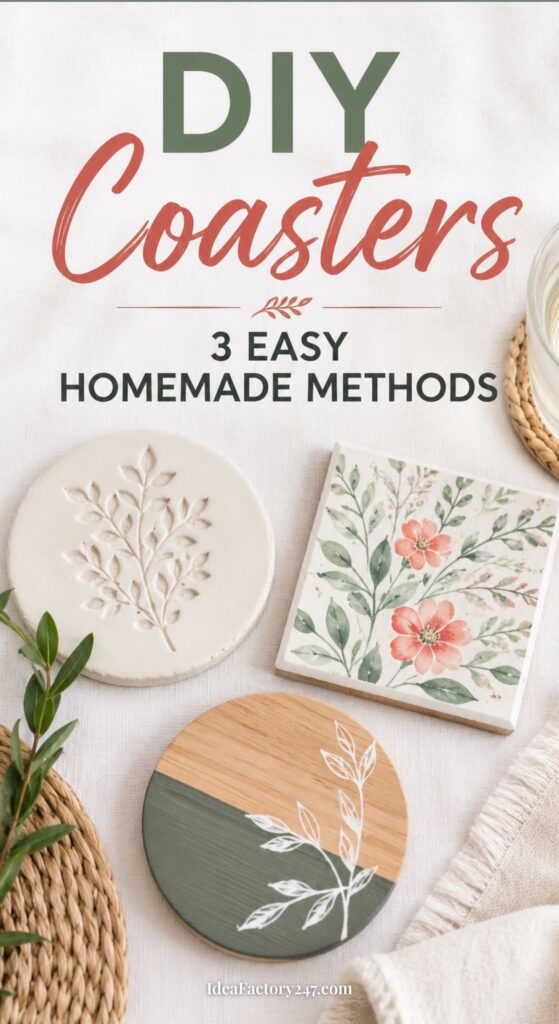
The best part? You don’t need any special skills or equipment. The three methods below range from “I’ve never crafted a day in my life” easy to “I want to make something that looks truly handmade” satisfying. Pick the one that fits your time, budget, and style — or make all three for a mixed gift set.
JUMP TO:
- Method 1: Air Dry Clay Coasters
- Method 2: Tile Coasters with Napkin Decoupage (my personal fave!)
- Method 3: Wooden Coasters
- How to Package Your Coasters for Gifting
- Caring for Your DIY Coasters
What Makes DIY Coasters Such a Great Homemade Gift
Before we get into the methods, here’s why coasters specifically work so well as gifts:
They’re universally useful. Everyone drinks beverages. Everyone has surfaces they’d rather not ruin. Coasters are one of those gifts where there’s no awkward “what do I do with this” moment.
They’re customizable. You can match someone’s home decor colors, add their initials, use their favorite pattern or motif — the personalization options are genuinely endless.
They’re giftable year-round. Holiday gifts, hostess gifts, housewarming gifts, teacher appreciation, Mother’s Day, Father’s Day — coasters fit every occasion and every recipient.
They’re inexpensive to make. Most methods cost $1-3 per coaster, and a set of four looks like something that cost $30-40 from a boutique home store.
They’re great for men. If you’ve ever struggled to find a handmade gift for a dad, husband, boyfriend, or brother — coasters are one of the best options. Practical, not fussy, and if you use the right design they feel genuinely masculine. More on the men’s gift angle below.
Quick Reference: What You’ll Need by Method
| Method | Main Materials | Skill Level | Cost Per Set of 4 | Time |
|---|---|---|---|---|
| Air Dry Clay | Clay, stamps or tools, paint, sealer | Beginner | $3-5 | 2-3 hours + drying |
| Tile Decoupage | Ceramic tiles, napkins or paper, Mod Podge, felt | Beginner | $2-4 | 1-2 hours |
| Wooden | Wood rounds, paint or stain, sealer, felt | Beginner-Intermediate | $4-8 | 2-3 hours |
Method 1: Air Dry Clay Coasters
Air dry clay coasters are having a major moment on Pinterest right now — and once you make a set you’ll completely understand why. They look handcrafted in the best possible way, they’re endlessly customizable, and the technique is genuinely forgiving. No kiln, no special equipment, no experience required.
If you’ve never worked with air dry clay before, check out our Air Dry Clay 101 guide for beginners before you start — it covers everything you need to know about working with the material.
What You’ll Need
- Air dry clay (Crayola Air Dry Clay or DAS are both excellent beginner options)
- Rolling pin or smooth bottle
- Circle cookie cutter or a glass to cut round shapes (approximately 3.5-4 inches)
- Stamps, letter stamps, or texture tools for imprinting designs
- Acrylic paint
- Mod Podge or clear sealer (make sure it’s the waterproof/outdoor formula)
- Fine grit sandpaper (220 grit)
- Small felt pads for the bottom
Step-by-Step Instructions
Step 1: Roll and cut your clay Knead your clay briefly to warm it up and make it pliable. Roll out to approximately ¼ inch thickness — use two wooden chopsticks or paint stirrers on either side of your clay as guides to keep an even thickness. Cut your circles using a cookie cutter or the rim of a glass. Smooth any rough edges with damp fingers.
Step 2: Add your design This is the fun part. While the clay is still soft, press your stamp, texture mat, or design tool firmly into the surface. Some ideas that work beautifully:
- Letter stamps for monograms or initials
- Leaf or botanical stamps for a natural look
- Geometric pattern rollers for a modern aesthetic
- Holiday cookie cutters pressed lightly for a seasonal impression
- Simply draw designs freehand with a toothpick or stylus
Step 3: Dry completely Place your coasters on a flat surface to dry. Air dry clay typically takes 24-48 hours to dry completely depending on thickness and humidity. Flip them halfway through drying to prevent warping. Don’t rush this step — clay that isn’t fully dry will crack when painted.
Step 4: Sand smooth Once fully dry, lightly sand any rough edges or surfaces with fine grit sandpaper. Wipe away dust with a slightly damp cloth and let dry completely.
Step 5: Paint Apply acrylic paint in thin, even coats. Two coats usually gives full coverage. Let each coat dry completely before adding the next. Some design ideas:
- Paint the entire coaster one color and let the stamped impression show as a texture
- Paint the raised design a contrasting color for a two-tone look
- Leave natural/unpainted for a minimalist look and just seal
Step 6: Seal This is non-negotiable — unsealed clay coasters will absorb moisture and eventually crack. Apply 2-3 coats of Mod Podge Outdoor formula or a waterproof clear sealer, letting each coat dry fully. The outdoor formula is the most water-resistant option for something that will have wet glasses placed on it regularly.
Step 7: Add felt pads Stick small felt pads to the four corners of the bottom of each coaster. This protects surfaces from scratching and gives the coasters a finished, professional feel.
Yield: One standard block of air dry clay (2.5 lbs) makes approximately 8-12 coasters depending on thickness — enough for two full gift sets.
Drying + active time: 30 minutes active, 24-48 hours drying, 30 minutes painting and sealing.
Method 2: Tile Coasters with Napkin Decoupage
This is my personal favorite! And it’s the easiest, most budget-friendly method on the list — and the results are genuinely stunning.
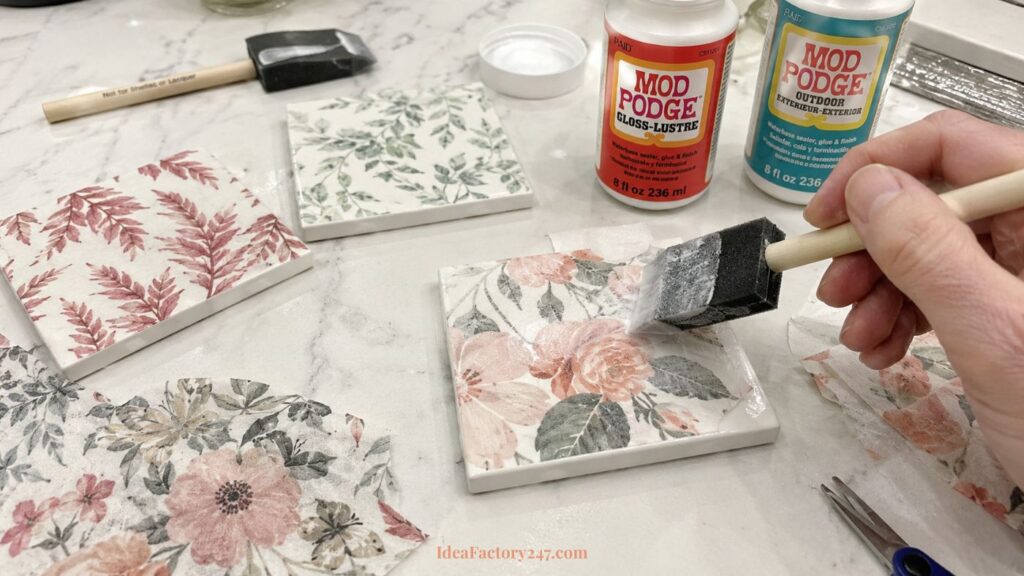
Plain ceramic tiles from the hardware store become beautiful, personalized coasters with nothing more than decorative napkins and Mod Podge. The napkin decoupage technique means you can use any pattern imaginable — florals, geometric prints, holiday motifs, watercolor designs — and the finished coasters look like they were professionally printed.
What You’ll Need
- 4-inch square ceramic tiles (find them at Home Depot or Lowes for about $0.25-0.50 each)
- Decorative paper napkins or tissue paper in your chosen pattern
- Mod Podge (matte or glossy finish) – this starter kit with foam brushes works great
- Foam brush or soft bristle brush
- Scissors
- Mod Podge Outdoor or waterproof sealer for the final top coat
- Cork sheet or self-adhesive felt for the bottom (cut to size)
Choosing Your Napkins
This is where the magic happens. Look for napkins with patterns that appeal to whoever you’re gifting to:
- For her: Floral prints, watercolor botanicals, vintage-style patterns
- For him: Geometric patterns, buffalo check, woodgrain, maps
- For the holidays: Plaid, snowflakes, pine branches, winter botanicals
- For a hostess gift: Something that matches common home decor styles — neutral linen textures, simple stripes, abstract prints
Decorative cocktail napkins from HomeGoods, TJ Maxx, or even party supply stores work perfectly. Three-ply napkins need to be separated — you only use the top printed ply for decoupage.
PRO TIP: If you are super particular about the napkin design or pattern (like me!), I’ve found sellers on Etsy who are selling some gorgeous ones. They only sell you 5 or 6 napkins and they can be pricey, but honestly you should only need a few napkins to create a set of four to six coasters.
Step-by-Step Instructions
Step 1: Prep your tiles Wipe tiles clean and dry. If they have any texture, lightly sand and wipe clean.
Step 2: Separate your napkin layers Carefully peel apart the layers of your napkin — you only want the thin printed top layer. The other layers get discarded. This thin layer is what gives decoupage its beautiful, almost painted-on look.
Step 3: Apply Mod Podge to the tile Brush a thin, even layer of Mod Podge over the entire top surface of the tile. Work quickly.
Step 4: Apply the napkin Lay your napkin layer over the wet Mod Podge, centering your design. Gently smooth from the center outward, working out any wrinkles or bubbles with your fingers or a soft brush. Don’t panic about small wrinkles — they mostly disappear as it dries and add to the handmade charm.
Step 5: Trim and wrap edges Once positioned, fold any overhanging napkin over the edges of the tile and press down. Trim any excess with scissors for a cleaner edge, or wrap it fully around to the back for a more finished look.
Step 6: Seal with Mod Podge Apply 2-3 thin coats of Mod Podge over the entire top and edges, letting each coat dry completely. Then apply 2 coats of a waterproof outdoor sealer for protection. The more coats, the more durable the finished coaster.
Step 7: Add cork or felt backing Cut cork sheet or felt to size and adhere to the back of each tile. This is important — without it the tile will scratch surfaces and slide around.
Yield: One set of 4 tiles costs approximately $1-2. Napkins typically have 20 per pack for $4-6, giving you more than enough for multiple sets.
Active time: About 45 minutes for a set of 4, plus drying time between coats.
Method 3: Wooden Coasters
Wooden coasters are the most elevated-looking of the three methods — and they’re especially popular as gifts for men. A set of wood round coasters with a simple painted design, wood burned pattern, or even just a clean stained finish looks genuinely artisan. They’re the kind of thing people display on their coffee table rather than hide in a drawer.
What You’ll Need
- Pre-cut wood rounds or squares (3.5-4 inch diameter, available on Amazon or at craft stores)
- Acrylic paint, wood stain, or both
- Paintbrushes in various sizes
- Pencil for sketching designs
- Fine grit sandpaper (220 grit)
- Waterproof sealer or Mod Podge Outdoor
- Small felt pads for the bottom
- Optional: wood burning tool for burned designs
Design Ideas by Recipient
For men/dad: Simple geometric patterns, buffalo plaid, monogram initials, mountain silhouettes, compass rose, state outlines, sports team colors (keep it simple — solid color + single design element)
For her: Watercolor-style florals, gold leaf edges, abstract brushstroke patterns, botanical prints, monograms with decorative flourishes
For the holidays: Pine trees, snowflakes, simple reindeer silhouette, plaid patterns in red and green or navy and cream, gold and white geometric
For a hostess: Neutral tones with simple abstract designs — these work in any home and feel sophisticated rather than themed
Step-by-Step Instructions
Step 1: Sand your wood rounds Even pre-cut wood rounds benefit from a light sanding with 220 grit sandpaper. Sand with the grain, wipe clean.
Step 2: Apply base coat if desired If painting, apply a base coat of acrylic paint and let dry completely. Two thin coats give a cleaner finish than one thick coat. If staining, apply wood stain with a cloth, wipe off excess, and let dry per the stain’s instructions.
Step 3: Add your design
- Paint: Sketch your design lightly in pencil first. Paint over with a fine brush. Simple designs work best — clean lines, minimal detail, high contrast.
- Wood burning: Use a wood burning tool to burn your design directly into the wood. Practice on scrap wood first. This takes a little more skill but produces stunning results.
- Stamps: Ink-based stamps work on raw or lightly stained wood. Press firmly and evenly.
Step 4: Seal Apply 2-3 coats of waterproof sealer, letting each coat dry fully. Wooden coasters especially need good sealing since wood will swell and warp with repeated moisture exposure.
Step 5: Add felt pads Add self-adhesive felt pads to the four corners of the bottom of each coaster.
Yield: Pre-cut wood rounds typically come in packs of 10-20 on Amazon, costing $8-15 per pack — about $0.75-1.50 per coaster before paint and sealer.
Active time: 45-60 minutes for a set of 4, plus drying time.
How to Package Your DIY Coasters as Gifts
Coasters are one of the most giftable DIY projects because they package so naturally as a set. Here’s how to make them look beautiful:
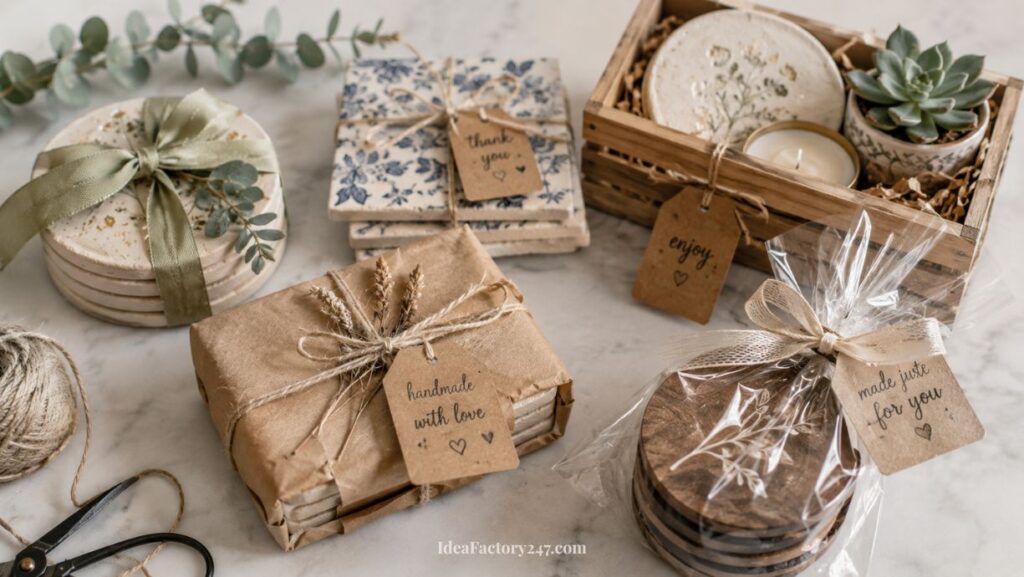
Ribbon and stack: Stack four coasters, wrap with a wide ribbon or strip of leather cord, and tie a bow. Add a sprig of eucalyptus or a cinnamon stick for a holiday touch. Simple, elegant, and requires no box.
Kraft paper wrap: Stack and wrap the set in kraft paper like a small package. Secure with twine and add a handwritten tag. Very artisan, very Pinterest.
Small wooden crate or tray: Arrange four coasters in a small wooden crate from the dollar store, lined with tissue paper or crinkle paper. Add a small candle or plant alongside for a full gift set.
Clear cellophane bag: Stack, slide into a tall clear bag, tie with ribbon. Works especially well with the tile coasters where the pattern is visible through the cellophane.
What to write on the tag: Include the material so they know how to care for them — “Handmade air dry clay coasters — wipe clean, not dishwasher safe” is all you need.
Caring for Handmade Coasters
A quick care note worth including on your gift tag:
- All methods: Wipe clean with a damp cloth. Not dishwasher safe.
- Clay coasters: Handle with care — despite the sealer, air dry clay is not as durable as kiln-fired ceramic. Gentle use only.
- Tile coasters: The most durable of the three. Can handle more moisture but still wipe rather than soak.
- Wood coasters: Keep away from prolonged water exposure. Wipe dry after use.
More DIY Gift Ideas You’ll Love
- Christmas Simmer Pot Recipes
- DIY Peppermint Sugar Scrub
- DIY Christmas Soap Bars
- DIY Holiday Shower Steamers (coming soon!)
- Gingerbread Body Butter
- Air Dry Clay 101 for Beginners
- DIY Holiday Candles
Please note: This website contains affiliate links. As an Amazon Associate, we earn from qualifying purchases at no additional cost to you.
.