If you’ve ever wanted to make homemade soap but felt intimidated by the lye process, this is your entry point — and honestly, it might be the most fun DIY project of the entire holiday season.
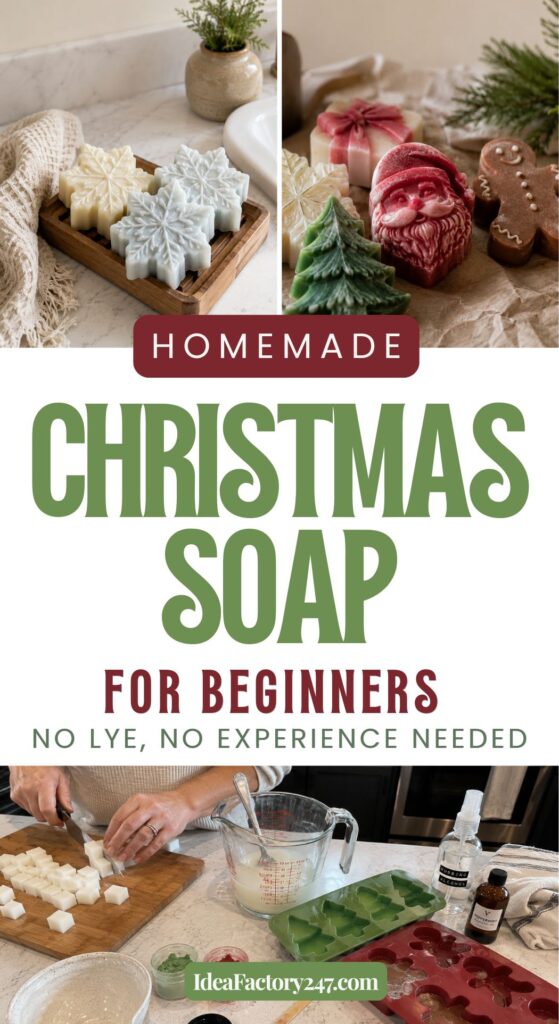
Melt-and-pour Christmas soap bars are exactly what they sound like: you melt a pre-made soap base, add your colors and scents, pour into festive silicone molds, and pop out the most adorable shaped soaps you’ve ever seen.
Snowflakes, gingerbread men, Santa faces, Christmas trees, reindeer — the molds available on Amazon right now are genuinely incredible, and the soaps they produce look like something from a boutique gift shop.
No lye. No curing time. No special equipment beyond a microwave and a silicone mold. And the finished product makes one of the most charming, unique homemade Christmas gifts you can give — to teachers, coworkers, neighbors, friends, or anyone on your list who appreciates something handmade and beautiful.
Why Melt-and-Pour Soap Is Perfect for Beginners
Traditional cold process soap making (like our DIY tallow soap recipe) involves working with lye, precise temperatures, and a 4-6 week cure time. It’s deeply rewarding but requires some experience and attention to safety.
Melt-and-pour soap skips all of that. The saponification has already happened in the soap base — all you’re doing is melting it down, customizing it, and reshaping it. The result is a real bar of soap that lathers, cleanses, and feels great on skin. It’s just dramatically easier and faster to make.
Melt-and-pour is ideal when you want to:
- Make soap for the first time
- Create shaped or decorative soaps that would be difficult in cold process
- Make a large batch of gifts quickly
- Involve kids in the soap-making process
- Have finished soaps ready to give within hours, not weeks
What You’ll Need
Quick Reference: Supplies at a Glance
| Supply | What to Choose | Where to Find It |
|---|---|---|
| Soap base | Clear glycerin, white glycerin, shea butter, or goat milk | Amazon, craft stores |
| Silicone mold | Snowflake, gingerbread man, Christmas tree, Santa, pinecone | Amazon |
| Colorant | Mica powder (best) or soap-safe liquid colorant | Amazon, craft stores |
| Fragrance | Peppermint EO, gingerbread FO, pine FO, orange clove FO | Amazon, craft stores |
| Rubbing alcohol | Any concentration — 70% or 91% both work | Drugstore |
| Pouring pitcher | Microwave-safe with a handle and spout | Amazon, kitchen store |
| Kitchen scale | Any digital kitchen scale | Amazon |
EO = essential oil · FO = fragrance oil
The details on each supply are below — but if you already know what you’re doing, that table is all you need to get started.
Soap Base Options
The soap base is the foundation of your bars. You can find these on Amazon or at craft stores:
- Clear glycerin soap base — transparent when set; great for showing off colors and embedded botanicals
- White glycerin soap base — opaque; gives a clean, classic look; colors show up brighter
- Shea butter soap base — extra moisturizing; slightly creamy color; wonderful for dry skin
- Goat milk soap base — creamy, nourishing, very skin-friendly; a great gift for people with sensitive skin
- Coconut oil soap base — great lather, clean rinse, slightly firmer bar
For Christmas soaps, white or shea butter base tends to give the most beautiful results — colors pop and the shaped details show up clearly. Clear base is stunning for an icy snowflake look.

Moisturizing Melt and Pour Glycerin Soap Base for Crafting and Soap Making, Easy to Cut, Unscented - 5 Pound
Colorants
- Mica powder — the best choice for soap; comes in every color imaginable; a little goes a long way
- Soap-safe liquid colorants — easy to use and mix; good for vibrant colors
- Natural colorants — spirulina for green, beetroot powder for pink/red, turmeric for yellow/orange; colors are more muted but completely natural
Christmas color ideas: Red, green, white, icy blue, gold, silver, deep burgundy
Scents
- Fragrance oils — formulated specifically for soap; hold scent well; widest variety
- Essential oils — more natural option; some fade faster in soap than others
Holiday scent ideas:
- Peppermint essential oil — classic, clean, everyone loves it
- Cinnamon fragrance oil — warm and spicy (use fragrance oil rather than cinnamon essential oil in soap — it can be skin-sensitizing)
- Balsam fir or pine fragrance oil — smells exactly like a Christmas tree
- Orange and clove — warm, festive, sophisticated
- Vanilla — cozy and universally appealing
- Gingerbread fragrance oil — sweet and spiced, perfect for the gingerbread man molds
Silicone Molds
This is where the magic happens. Look for Christmas-themed silicone molds on Amazon — here are the shapes to look for:
- Snowflake molds — intricate and beautiful, especially in icy blue or white
- Gingerbread man molds — adorable in brown-tinted soap with a gingerbread fragrance oil
- Santa and reindeer molds — fun and whimsical, great for gifting to kids
- Christmas tree molds — stunning in green with gold mica highlights
- Gift box and bow molds — elegant and versatile
- Pinecone molds — gorgeous in natural tones, very Pinterest-worthy
Standard loaf molds with a holiday cookie cutter pressed in afterward also work beautifully. I’m going to try this mold this year….

This large Christmas silicone mold features a Gingerbread Man, Candy House and pin tree. Perfect for making DIY Christmas soap, candles or holiday baking.
Additional Supplies
- Microwave-safe measuring cup or pouring pitcher (with a handle — makes pouring into molds much easier)
- Microwave or double boiler
- Stirring spoon or craft sticks
- Rubbing alcohol in a small spray bottle (eliminates bubbles on the surface)
- Kitchen scale
- Sharp knife for cutting if using a loaf mold

LCD Display, Tare Function, Weighs up to 11 Pounds
Basic Melt-and-Pour Christmas Soap Recipe
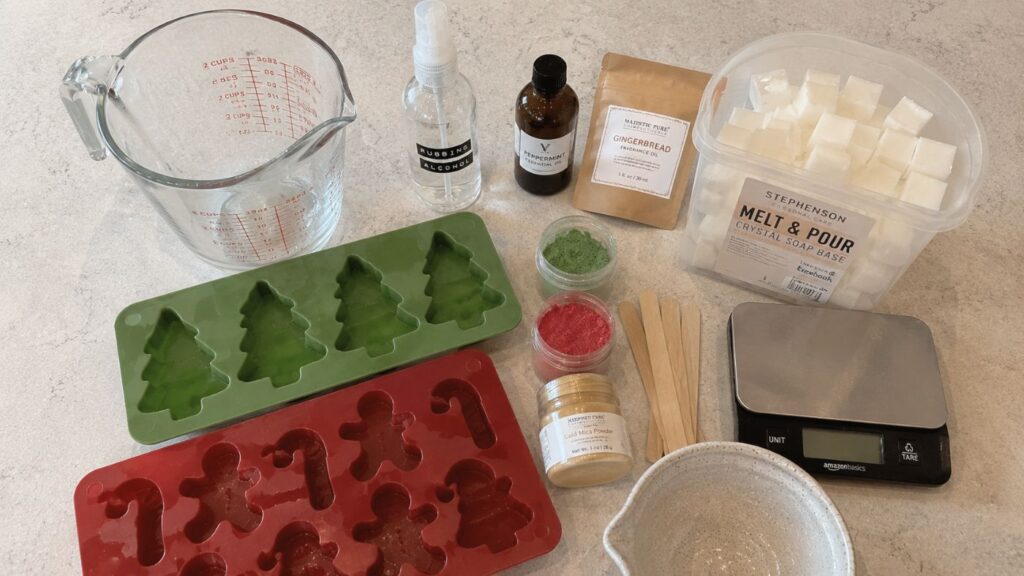
This base recipe works with any of the mold shapes and scent combinations. Makes approximately 6-8 individual shaped soaps depending on mold size.
How Many Bars Will This Make?
It depends entirely on your mold size, but here’s a practical guide based on 16 oz of soap base:
- Snowflake molds (6-cavity, standard size) — 16 oz fills approximately 1.5 molds, giving you 8-10 snowflake bars. Perfect for a teacher gift set with some left over for yourself.
- Gingerbread man molds (6-cavity) — similar yield, 8-10 bars per 16 oz batch.
- Large single-cavity molds (Santa face, large snowflake, pinecone) — 16 oz makes approximately 4-6 bars depending on the depth of the mold.
- Loaf mold (standard 10-inch) — 16 oz fills one loaf perfectly, which cuts into approximately 8-10 rectangular bars.
A 16 oz block of melt-and-pour soap base costs roughly $8-12 depending on the type, which means your cost per bar is typically $1-2 including fragrance and colorant — even less if you buy base in larger quantities. For a gift that looks like it came from a boutique soap shop, that’s an incredible value.
Want to make more? Simply scale up — 32 oz (2 lbs) of soap base will give you 16-20 snowflake bars, enough for a full set of teacher gifts or a coworker exchange with plenty to spare.
Ingredients:
- 16 oz (454g) melt-and-pour soap base of your choice
- 1-2 teaspoons fragrance oil or essential oil (approximately 1 oz per pound of soap base)
- Mica powder or colorant — start with ¼ teaspoon and adjust
- Optional: dried herbs, glitter (cosmetic grade), or small botanicals for decoration
Instructions:
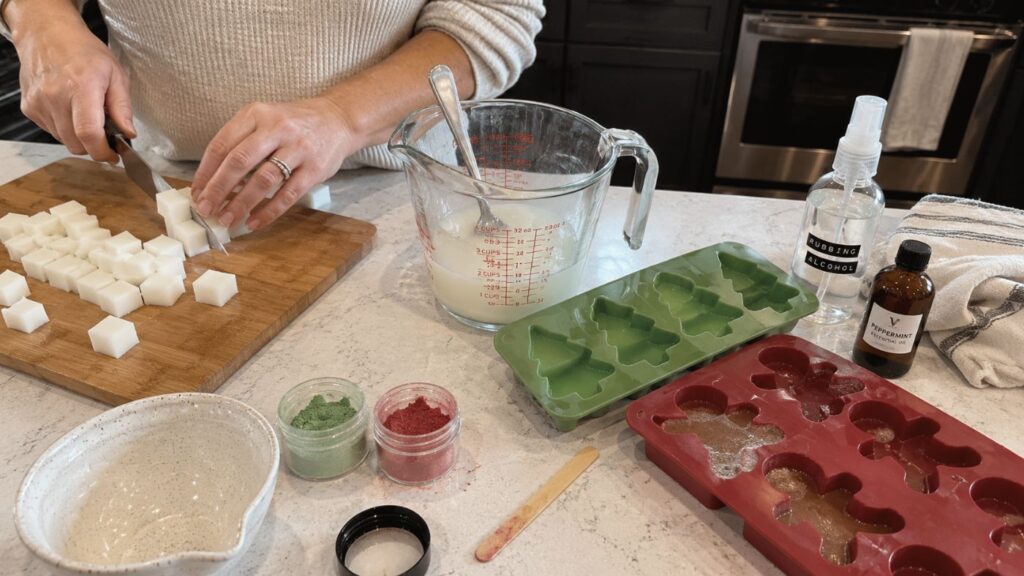
Step 1: Cut and Melt Cut your soap base into small cubes — roughly 1-inch pieces. This helps it melt evenly and quickly. Place in a microwave-safe measuring cup.
Microwave in 30-second bursts, stirring between each, until fully melted. Don’t overheat — you want it just melted, not boiling. Overheating can cause the soap to develop a skin on top and affect the finished texture. A double boiler on the stove works too if you prefer.
Step 2: Add Color Add a small amount of mica powder or liquid colorant to your melted soap and stir well. Start with less than you think you need — colors intensify as the soap sets. You can always add more.
For two-tone soaps (like a white snowflake with blue edges), divide your melted soap into two batches and color separately, then layer in the mold.
Step 3: Add Fragrance Add your fragrance or essential oil and stir gently but thoroughly. Stir slowly to avoid creating air bubbles. A good rule of thumb is about 1 oz of fragrance per pound of soap base, but check your fragrance oil’s recommended usage rate.
Step 4: Pour Pour the melted soap into your silicone molds slowly and steadily. Fill to just below the top edge.
Immediately spritz the surface lightly with rubbing alcohol — this pops any bubbles on the surface and gives you a smooth, professional finish.
If you want to add decorative elements on top (dried flowers, a sprinkle of mica, cosmetic glitter), add them now before the soap sets.
Step 5: Let Set Allow the soaps to cool and harden completely at room temperature — usually 1-2 hours for individual shaped molds. You can speed this up by placing the molds in the refrigerator for 30-45 minutes, but avoid the freezer as it can cause condensation issues.
Step 6: Unmold Once fully set, gently flex the silicone mold to release the soaps. They should pop out cleanly. If a shape is intricate, work slowly from the edges inward.
How Long Does This Take?
One of the best things about melt-and-pour soap is the turnaround time. Here’s what a typical session looks like:
- Prep (cutting soap base, measuring colorants and fragrance, setting up molds) — 10 minutes
- Melting and mixing — 5-10 minutes
- Pouring — 5 minutes
- Setting time — 1-2 hours at room temperature, or 30-45 minutes in the refrigerator
- Unmolding and packaging — 10-15 minutes
Total active time: about 30 minutes. Total time start to finish including setting: 1.5-2.5 hours.
Compare that to cold process soap which requires 45-60 minutes of active work plus a 4-6 week cure time — melt-and-pour is in a completely different category for anyone making gifts on a timeline. You can realistically make a full batch of 20+ gift-ready Christmas soap bars in a single afternoon.
Christmas Soap Color + Scent Combinations
Here are some tried-and-true combinations that look and smell incredible:
Snowflake Soaps
- Clear or white base + icy blue mica + peppermint essential oil
- Look: crystalline, winter, elegant
- Best mold: intricate snowflake silicone mold
Gingerbread Man Soaps
- White base + brown mica (mix red + yellow + a touch of black) + gingerbread fragrance oil
- Look: warm, nostalgic, charming
- Best mold: gingerbread man mold — the detail is incredible
Christmas Tree Soaps
- White base + green mica + balsam fir or pine fragrance oil
- Add gold mica highlights on the “ornaments” with a small brush after unmolding
- Look: festive and beautiful
- Best mold: Christmas tree mold
Santa Soaps
- Divide soap: red base for hat, skin-tone for face, white for beard
- Layer colors in the mold carefully
- Fragrance: vanilla or cinnamon
- Look: whimsical and adorable, especially for kids
Pinecone Soaps
- White or shea base + warm brown/bronze mica + cedarwood or pine fragrance oil
- Look: natural, rustic, very Pinterest-worthy
- Best mold: 3D pinecone silicone mold
Tips for Perfect Results Every Time
Don’t overheat the soap base. Melt-and-pour soap that gets too hot can develop a grainy texture or a rubbery skin. Heat in short bursts and stop as soon as it’s liquid.
Spray with alcohol after pouring — every single time. This is the single biggest tip for professional-looking soaps. It eliminates every surface bubble instantly.
Work quickly once the soap is melted. Melt-and-pour sets faster than you’d expect, especially in smaller molds. Have your colors and fragrances measured out and ready before you melt.
Let it fully set before unmolding. Rushing this step is the most common mistake. If the soap isn’t fully firm it will distort when you flex the mold.
For intricate molds, slightly underfill rather than overfill. Overflow makes it harder to unmold cleanly.
Make a test bar first with a small amount before committing your full batch to a color or scent combination.
How to Package Christmas Soap Bars as Gifts
The packaging is half the gift with these — and fortunately it’s easy and inexpensive.
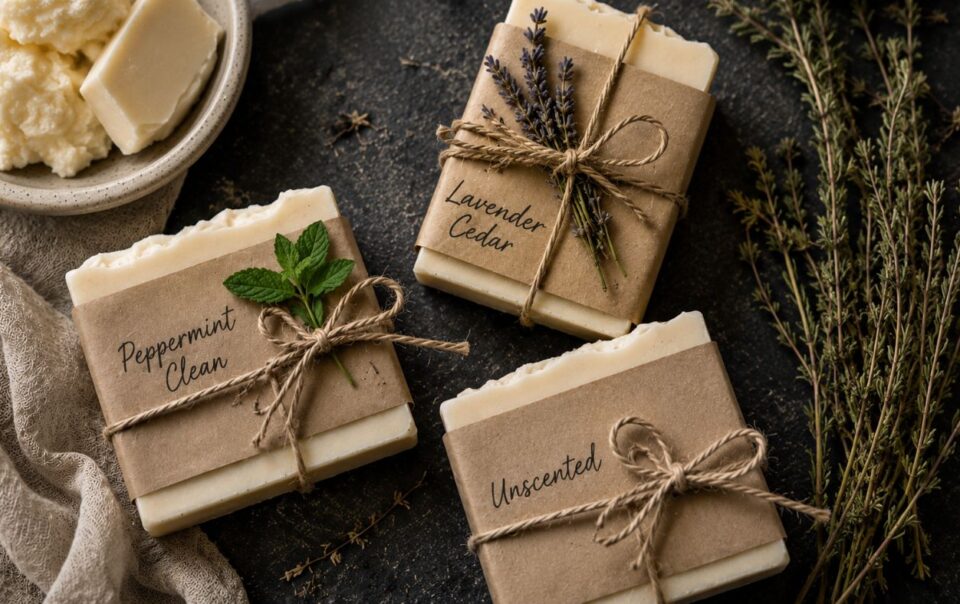
- Kraft paper wrap: Cut a rectangle of kraft paper, wrap the soap like a present, and secure with a sticker seal or washi tape. Add a handwritten or printed label with the scent name. Simple, beautiful, and very artisan.
- Clear cellophane bags: Let the shape and color show through. Tie the top with a ribbon in red, green, or gold. Perfect for snowflake and tree shapes where the visual detail is the star.
- Small gift boxes: Line a small kraft or white gift box with tissue paper, nestle 2-3 soaps inside, and close with a ribbon or bow. Feels like opening something from a boutique.
- Bundle sets: Group three soaps in complementary scents — peppermint snowflake, gingerbread man, and pine Christmas tree — for a complete holiday soap gift set. These are especially perfect for teachers and coworkers.
How Long Do Melt-and-Pour Soaps Last?
Melt-and-pour soaps are best used within 1 year. Unlike cold process soap which continues to cure and improve with age, melt-and-pour is best when relatively fresh. The scent can fade over time, especially with essential oils.
Store unwrapped soaps in a cool, dry place. Avoid humidity — glycerin-based soaps are hygroscopic, meaning they attract moisture from the air. Keeping them wrapped in cellophane or sealed packaging until ready to use will preserve them much longer.
Make a Whole DIY Holiday Gift Set
These Christmas soap bars pair beautifully with other homemade gifts for a complete spa-style holiday gift basket:
- DIY Peppermint Sugar Scrub
- Peppermint Bath Salts
- DIY Holiday Shower Steamers
- Gingerbread Body Butter
- DIY Holiday Candles
- Christmas Simmer Pot Recipes