
Please note: This website contains affiliate links. As an Amazon Associate, we earn from qualifying purchases at no additional cost to you.
.
If you’ve ever found yourself aggressively applying lip balm every ten minutes only for your lips to still feel like sandpaper, I have some news you might not like… You’re basically just moisturizing dead skin.
I learned this the hard way. I spent years wondering why my expensive balms weren’t “working,” only to realize they couldn’t actually reach my skin through the barrier of flakes. It’s like trying to lotion a pair of suede boots—it just sits on top.
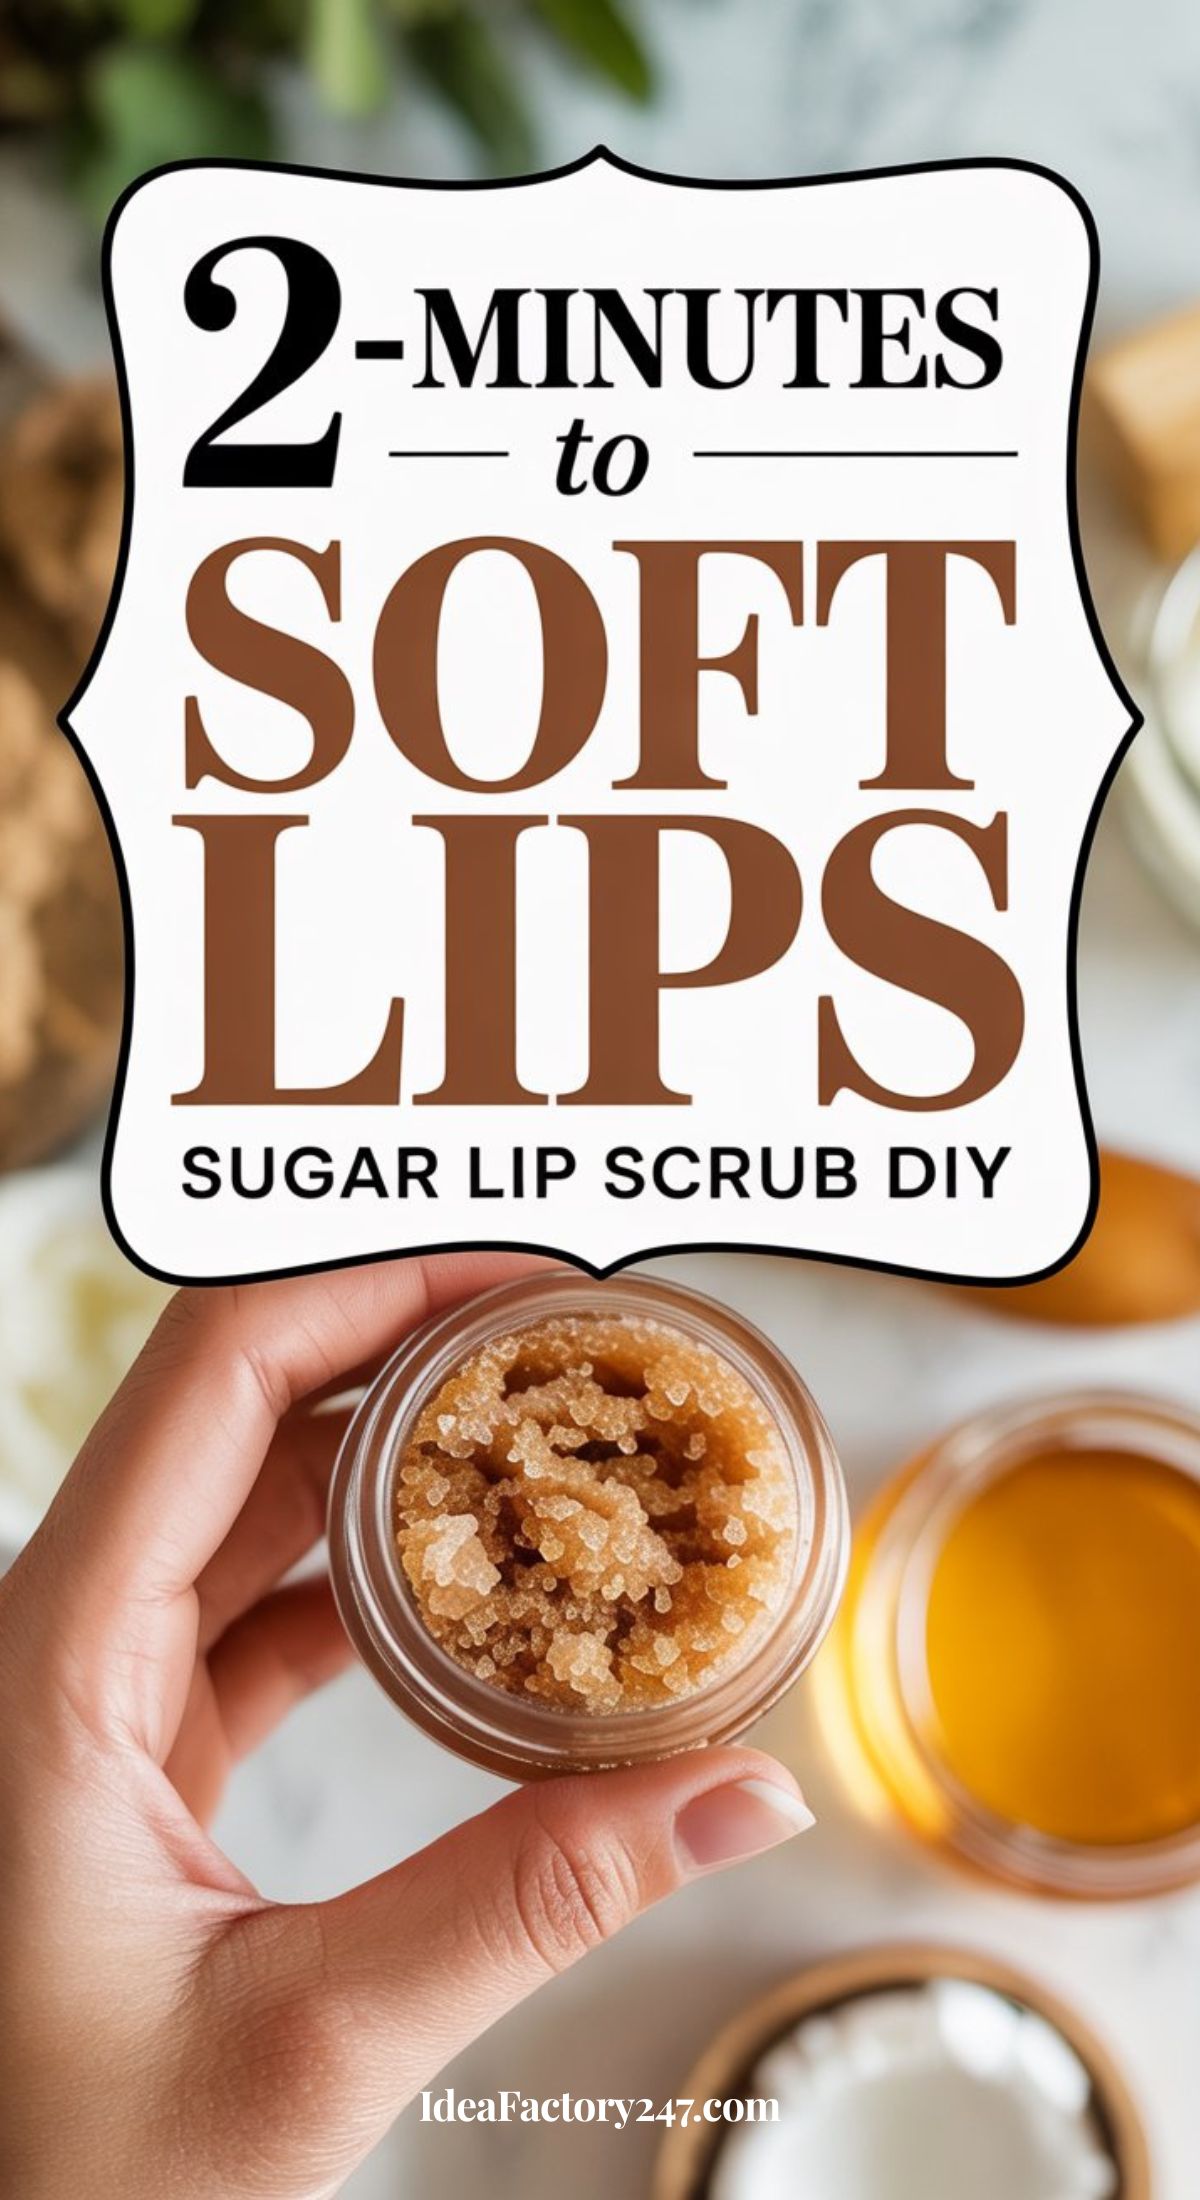
The secret? A 2-minute DIY lip scrub.
This DIY is the “reset button” for your pout. It gently buffs away the dry stuff so your balm can finally do its job.
Why You’ll Fall Head Over Heels for This DIY Lip Scrub
- The 2-Minute Miracle: It takes less time to make this than it does to find a hair tie at the bottom of your bag.
- Kitchen Staples Only: No “extract of rare mountain flower” here. You likely have everything in your pantry right now.
- The “Instant Glow-Up”: Your lips will feel noticeably softer the second you rinse it off.
- Fully Customizable: Want it to smell like a sugar cookie? Done. Want a little natural plump? Easy.
DIY Lip Scrub Recipe – Direct from Your Pantry!
This makes enough for a few uses. Keep it in a cute little jar on your vanity!
The Essentials:
- 1 tbsp Sugar: White sugar is scrubbier; brown sugar is a bit softer/gentler.
- 1 tbsp Honey: The “glue” that keeps it together and kills bacteria.
- 1 tsp Coconut Oil: For that deep, buttery moisture (olive oil works in a pinch!).
The “Bonus” Add-ins:
- A splash of Vanilla: Because who doesn’t want to smell like a cupcake?
- A pinch of Cinnamon: This creates a tiny bit of “tingle” that naturally pumps up the volume.
The How-To:
- Mix the base: Dump your sugar and honey into a small bowl and mash them together.
- Oil it up: Add your oil of choice. You’re looking for a thick, grainy paste—think wet sand at the beach.
- Customize: Stir in your vanilla or cinnamon last.
- Store: Pop it in a tiny airtight container. Since it’s all-natural, try to use it within 2 weeks!
How to Use Your New Sugar Lip Scrub (Without Making a Mess)
- The Gentle Circle: Apply a pea-sized amount to dry lips. Using your ring finger (it has the lightest touch!), rub in small circles for about 30 seconds. Don’t scrub like you’re cleaning a grout line—be gentle!
- The Reveal: Rinse with lukewarm water or just wipe it away with a damp cloth.
- The Seal: This is the most important part! Immediately slather on your favorite balm while your lips are fresh and “open” to moisture.
Pro Tip: Use this 1–2 times a week. Over-scrubbing is a thing, and we want soft lips, not raw ones!
The Ingredient Breakdown: Why This Works
| Ingredient | Why your lips love it |
| Sugar | A natural humectant that physically buffs away the “crusty” layer. |
| Honey | A total powerhouse that heals tiny cracks and locks in hydration. |
| Coconut Oil | Sinks in deep to repair the skin barrier. |
| Cinnamon | Briefly irritates the skin (in a good way!) to bring blood to the surface for a flush of color. |
Oops! Common Mistakes to Avoid
- The “Hulk” Approach: You aren’t sanding a deck. If it hurts, you’re pressing too hard.
- The “Linger”: Don’t leave the scrub on for 10 minutes. It’s an exfoliator, not a mask!
- The Naked Lip: Never scrub and then walk away. Your fresh skin is vulnerable; give it some balm immediately.
Your New 3-Step Lip Routine
If you want “TV commercial” levels of soft lips, stick to this simple rhythm:
- Scrub: 1–2 times a week (Sunday nights are perfect for this).
- Protect: Use your DIY balm (or tinted balm!) every day.
- Repair: Slather on a thick layer of balm or a lip mask right before bed. You’ll wake up with a perfectly smooth pout.
This combination makes a noticeable difference quickly.
Everything You’re Actually Wondering About this DIY Lip Scrub (FAQ)
Can I just use a toothbrush instead?
You can, but it’s a bit like using a broom to clean a silk scarf. A toothbrush can be a little too abrasive for the delicate skin on your lips. This scrub gives you a much more controlled, moisturizing exfoliation that won’t leave your lips feeling raw.
How long does this DIY scrub last?
Since we aren’t using preservatives, treat this like fresh food. In an airtight jar, it’ll stay good for about 2 weeks at room temperature. If it starts to smell “off” or the oil separates too much, just toss it and whip up a new batch—it only takes 60 seconds, after all!
My scrub got really hard. Is it ruined?
Nope! That’s just the coconut oil doing its thing (it turns solid when it’s cool). Just scoop a little out and let it melt between your fingertips for a second, or pop the jar in a bowl of warm water. It’ll be back to that perfect “wet sand” texture in no time.
Can I eat it?
I mean… technically, yes. It’s just sugar, honey, and oil. While I wouldn’t recommend it as a snack, the fact that it’s 100% edible is one of the best parts about making your own beauty products. No “mystery chemicals” here.
My lips are peeling—should I scrub them more?
Counter-intuitively, no. If your lips are actively peeling or bleeding, put down the scrub! Your skin is trying to heal. Skip the exfoliation for a few days and just keep them coated in a thick, simple balm. Wait until the “raw” feeling is gone before you start buffing again.
Other Lip Care Recipes You Might Like
If you’re building a full lip care routine, these pair perfectly with this scrub:
- Homemade Lip Balm for Beginners
- Naturally Tinted: Beetroot Lip Balm DIY Recipe
- DIY Overnight Lip Mask (For Soft, Smooth Lips by Morning)
Please note: This website contains affiliate links. As an Amazon Associate, we earn from qualifying purchases at no additional cost to you.
.