

Please note: This website contains affiliate links. As an Amazon Associate, we earn from qualifying purchases at no additional cost to you.
.
If you’ve ever had a child hand you a pinecone they found on the ground like it’s a priceless artifact, this craft is for you.
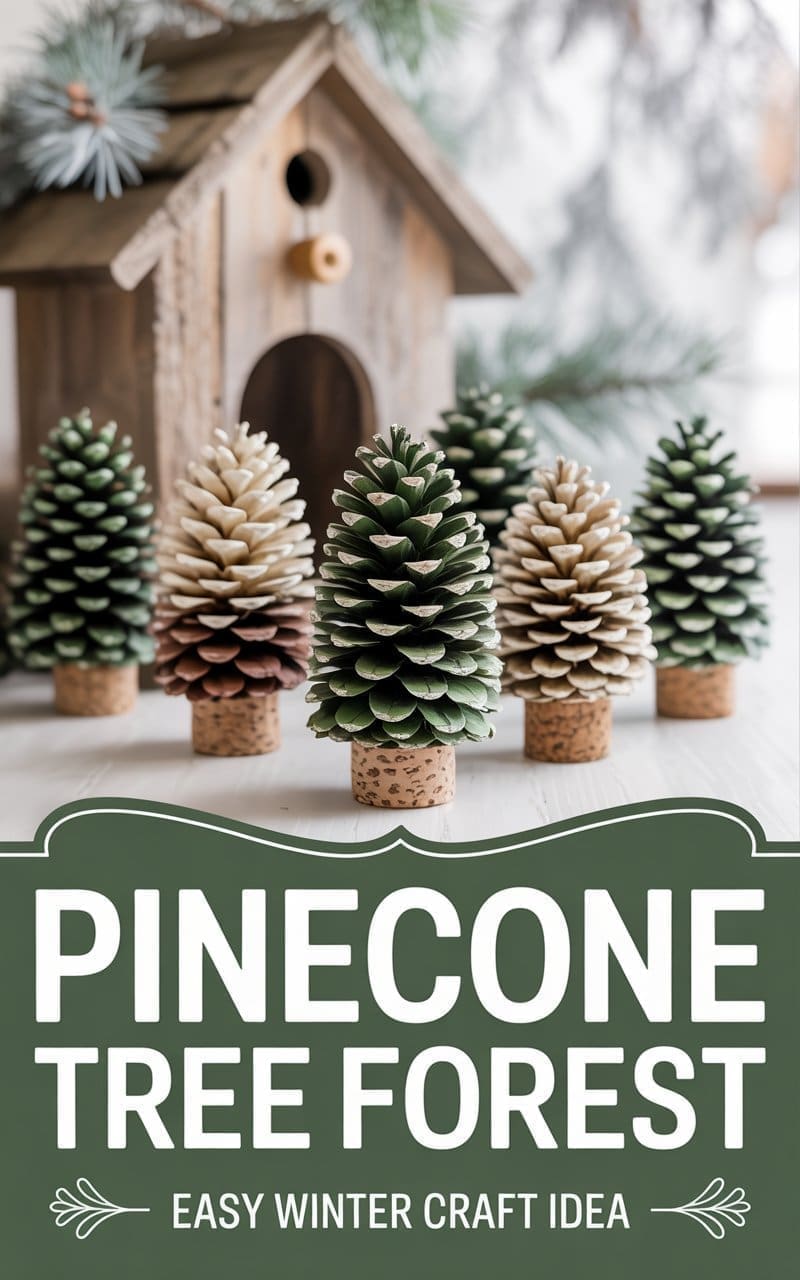
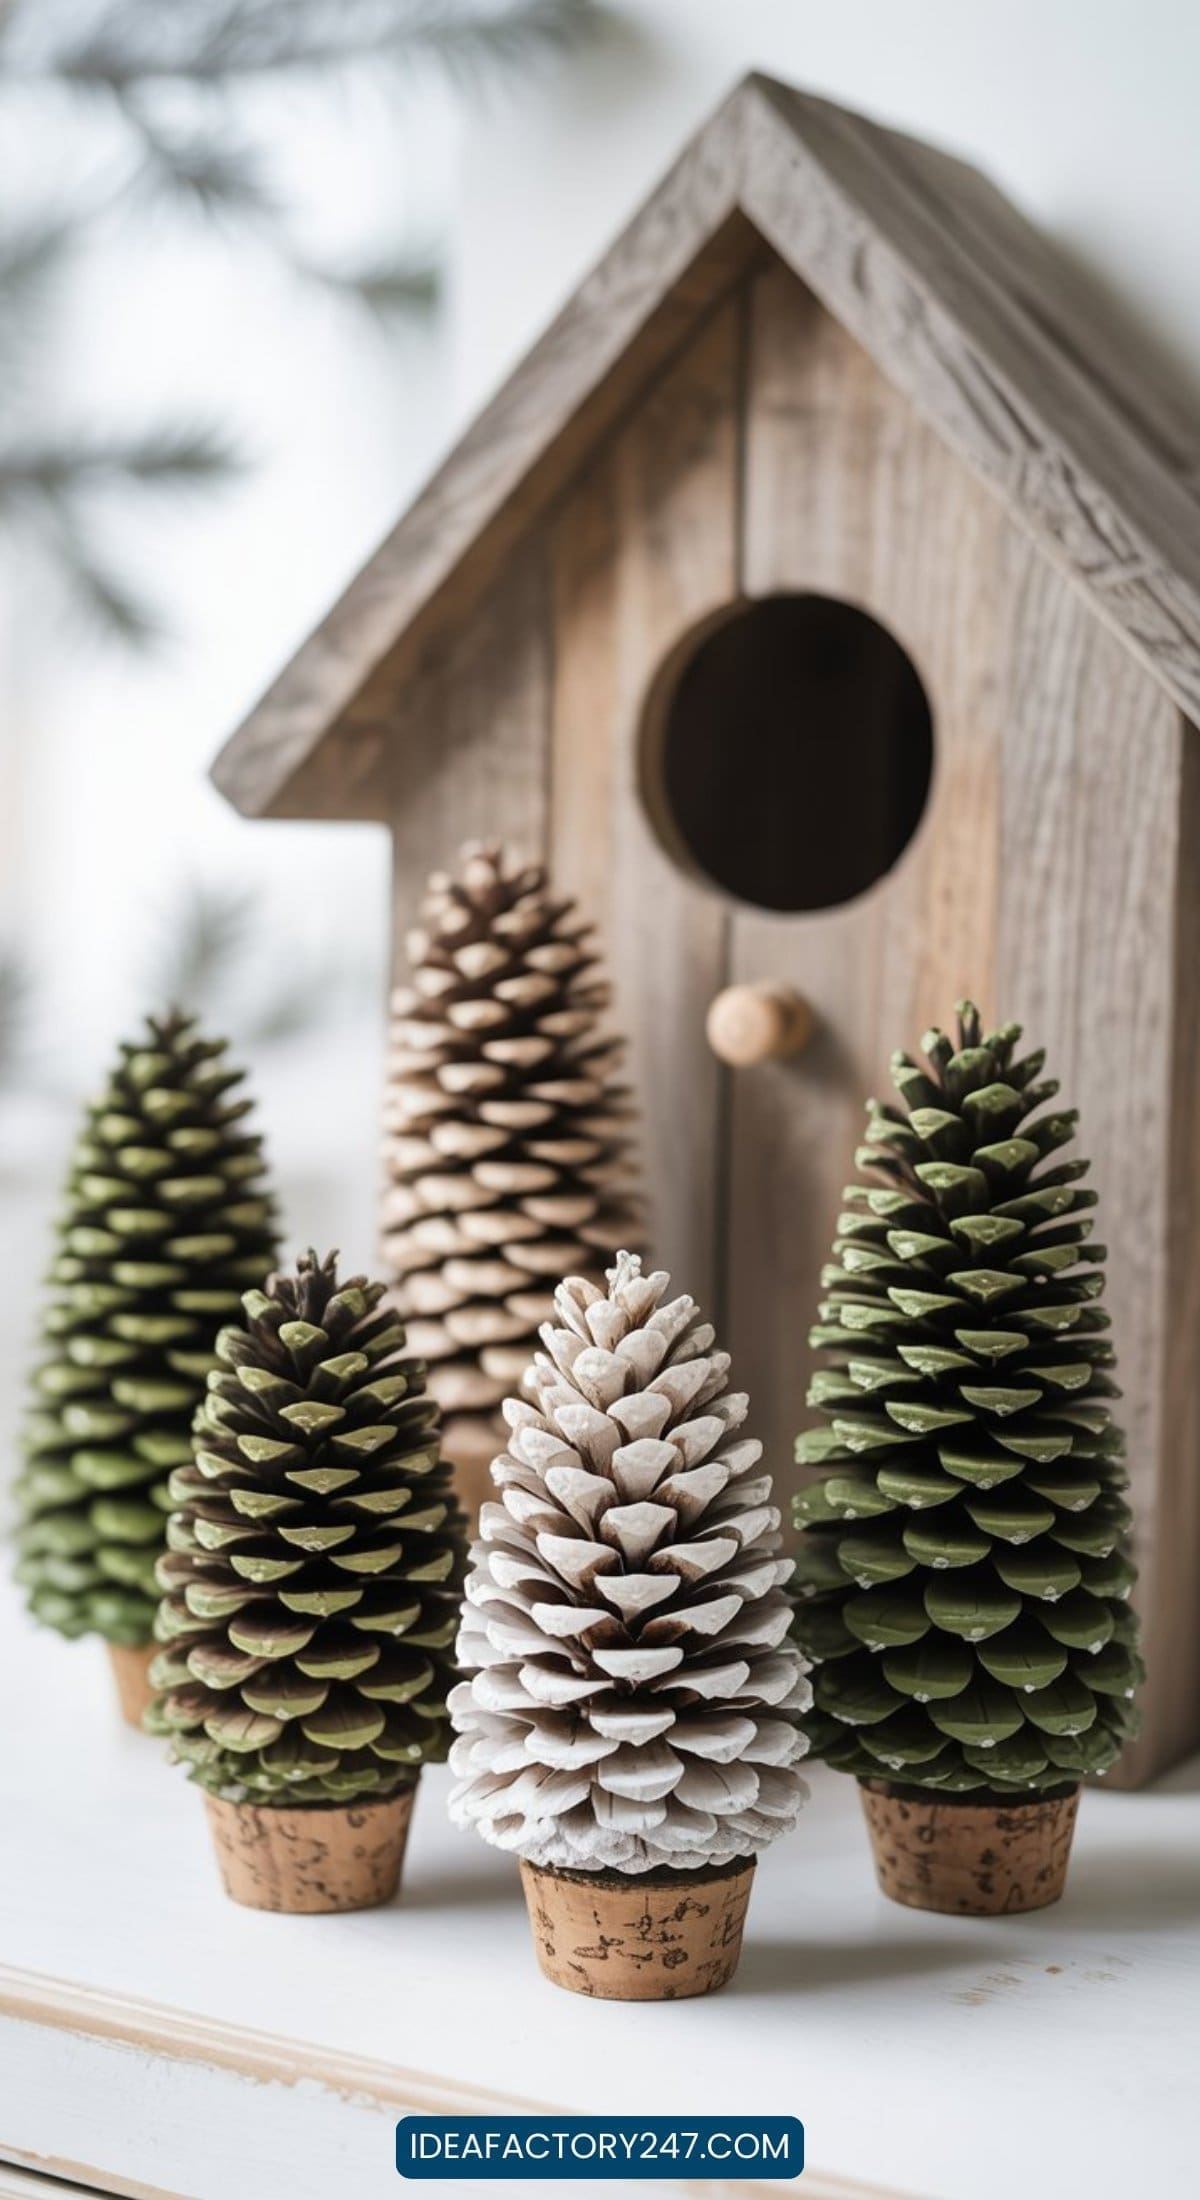
Painted Pinecone Winter Trees turn those “treasures” into adorable winter décor that looks like it belongs in a tiny Scandinavian forest village… or at least in the seasonal aisle at Target.
They’re fun, fast, kid-approved, and wildly photogenic. Line them up on a windowsill, cluster them on a tray, or add them to a winter village scene for instant cozy charm. Even better? Kids can paint to their heart’s content, and you still end up with something you’ll happily display (a true crafting unicorn).
Let’s turn those pinecones into a miniature winter wonderland.
Materials You’ll Need
You probably already have most of this — and the rest is easy to grab. We’ve included a few links to the products on Amazon to (hopefully) simplify your life a bit!
Pinecones
- Real pinecones (collected or you can purchase online) — Choose a mix of sizes so your “forest” looks more natural.
Paint Supplies
- Acrylic paint (white, metallic gold, champagne, icy blue, soft pastels)
- Foam brushes or small paintbrushes
- Paper plates or parchment paper (for paint palettes)
Tree Bases
- Wine corks (natural cork works best) – Save corks from holiday gatherings or buy a small bag of craft corks online.
- Tiny Galvanized Buckets – this is another great option that may look even better with your home decor.
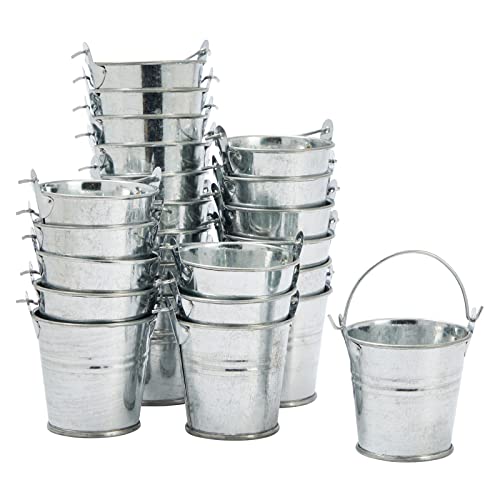
Mini Metal Buckets
Shop on Amazon
$14.09
2 x 2 in, Silver, Pack of 24 - Mini Tin Buckets with Handles for Party Favors, Galvanized Decor and our Painted Pinecone Trees winter craft idea.
We earn a commission if you make a purchase, at no additional cost to you.
02/28/2026 02:09 pm GMT
Decorative Extras (Optional but Magical)
- Glitter or faux snow
Shop Amazon for glitter
Faux snow - Twine or thin ribbon (optional)
Adhesive
How to Make Painted Pinecone Winter Trees
1. Prep Your Pinecones
If you collected pinecones outdoors:
- Bake them at 200°F for 20–25 minutes to remove bugs and help them open fully
- Let them cool completely before painting
If using store-bought pinecones, you can skip this step.
2. Choose Your Color Palette
This is where the personality comes in. Beautiful options include:
- Frosty whites and silvers
- Metallic gold or champagne
- Icy blues and soft teals
- Muted pastels for a Scandinavian-inspired look
Kids can choose their own colors — mismatched trees just make the forest more charming.
3. Paint the Pinecones
There are two styles that work beautifully with cork bases:
Snow-Dusted Trees
- Dip just the tips of the pinecone scales into white or metallic paint
- This gives a snowy, frosted effect
Fully Painted Trees
- Use a foam brush to paint the entire pinecone
- Metallic paints look especially stunning once dry
Foam brushes are easier for little hands and help prevent heavy paint buildup.
Let the pinecones dry for 10–20 minutes.
4. Add Snowy Texture (Optional)
While the paint is still slightly tacky — or using a thin layer of glue — sprinkle:
- Fine glitter
- Faux snow
- Or even a pinch of Epsom salt works like a charm!
This adds sparkle and gives the trees that dreamy winter feel.
Let everything dry completely.
5. Attach the Pinecones to the Cork Bases
This is the step that gives these trees their signature look.
- Stand a wine cork upright
- Add a generous dot of hot glue to the flat top of the cork
- Press the pinecone firmly onto the cork base
Hold for a few seconds until secure.
The cork adds height, stability, and a clean, minimalist base that makes the trees look intentionally styled — just like the ones in the photo.
6. Optional Finishing Touches
These trees are adorable as-is, but you can dress them up if you want:
- Lightly dry-brush white paint at the base for a “snowy trunk” look
- Tie a tiny twine bow around the cork
- Add a touch of gold paint to the very tips for extra sparkle
For younger kids, keeping it simple works best.
7. Display Your Pinecone Forest
These look especially charming when grouped together. Try displaying them:
- On a mantel
- On a tray or shelf
- Along a windowsill
- As part of a winter village scene
- On a holiday table centerpiece
A group of 5–9 trees in varying heights and colors creates the prettiest forest effect.
Personally, I loved the rustic wooden tray option because you can really cluster everything together and it’s easy to add other details like faux snow.
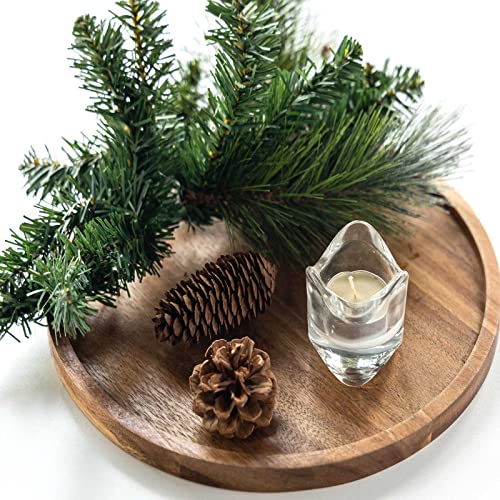
Round Wood Tray
Shop on Amazon
$9.98
11.5 Inches Candle Holder Tray Home Decor, Round Wood Tray for Decorative displays like our favorite winter craft, the homemade pinecone tree forest.
We earn a commission if you make a purchase, at no additional cost to you.
02/28/2026 07:02 pm GMT
Tips for Pinecone Tree Perfection
- Use pinecones with open scales — they paint more evenly and look fuller
- Mix metallics with soft neutrals for a balanced look
- For kids, pre-glue the pinecones to corks so they don’t wobble
- Matte paint = natural winter look
- Metallic paint = festive and elevated
- Optional: seal with a light spray of Mod Podge if you want them to last all season
Final Thoughts
Painted pinecone tree forests are one of those rare crafts that check all the boxes — easy, affordable, kid-friendly, and genuinely cute enough to display all winter long. With just a little paint and a simple wine cork base, those ordinary pinecones turn into a charming little forest that feels cozy, intentional, and full of personality.
Whether you’re crafting with kids on a snowy afternoon, decorating for the season, or looking for a low-stress project that actually turns out Pinterest-worthy, this painted pinecone tree craft is a total win. Mix colors, play with heights, and make it your own — because the best part of this DIY winter craft is that no two trees ever look exactly the same.
You may also enjoy:
20 Easy Winter Crafts to Make and Sell
,Cozy DIY Sock Snowmen: The Easiest Winter Craft Your Kids Will Actually Want to Make
Please note: This website contains affiliate links. As an Amazon Associate, we earn from qualifying purchases at no additional cost to you.
.