This website uses cookies to ensure you get the best experience on our website. View our Privacy Policy here.

Share this article via:
Please note: This website contains affiliate links. As an Amazon Associate, we earn from qualifying purchases at no additional cost to you.
.
Did you know that Pinterest searches for “boho Christmas decor” increased by 285% last holiday season? There’s something magical about blending free-spirited bohemian style with traditional Christmas charm! I’m excited to share how you can create a whimsical holiday atmosphere that breaks free from conventional red and green decorations.
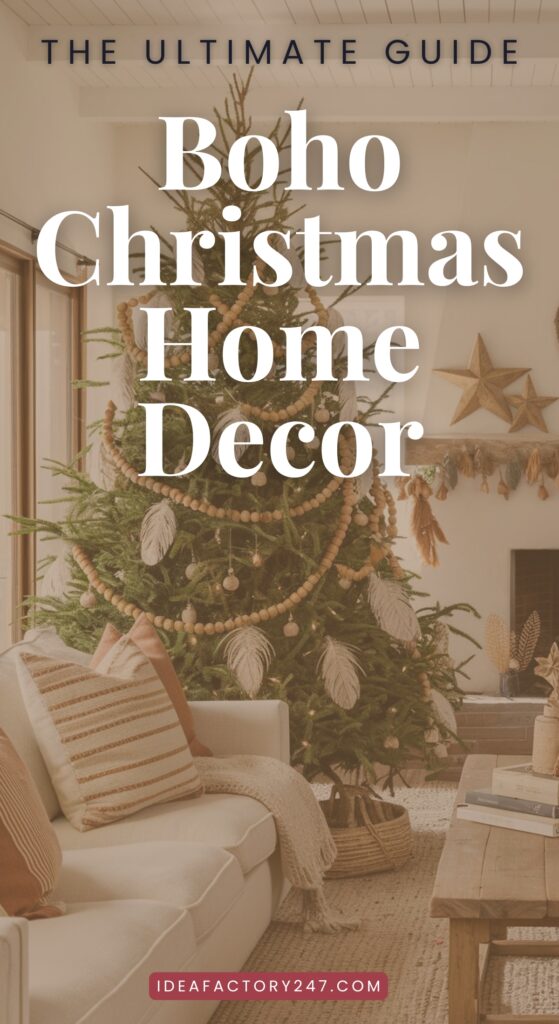
Whether you’re a dedicated maximalist or prefer subtle boho touches, these creative ideas will help you infuse your space with warmth, texture, and personality. Let’s transform your home into a bohemian winter wonderland!
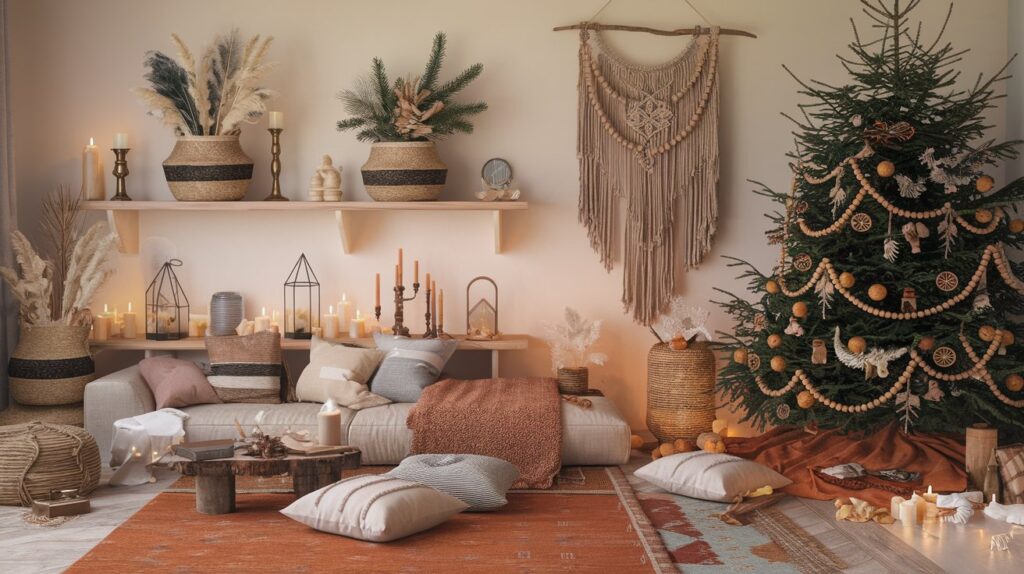
How I Finally Figured Out What Makes Christmas Decor Actually “Boho” (And Why It’s Not Just Throwing Macramé on Your Tree)
Let me tell you about my first attempt at bohemian Christmas decor. Bless my heart, I thought slapping some dreamcatchers on my tree and calling it a day would do the trick. Spoiler alert: it didn’t. After years of refining my style (and making plenty of mistakes), I’ve learned that bohemian holiday decorating is way more nuanced than I initially thought.
Here’s the thing about true boho Christmas style – it’s all about this beautiful tension between structure and freedom. Think of it like jazz music for your holiday decor. There’s definitely a rhythm to it, but it’s also wonderfully unexpected and personal.
The biggest aha moment for me was understanding that bohemian Christmas isn’t just a look – it’s a whole vibe. It’s about creating this warm, collected-over-time feeling that tells your story. My mother-in-law totally didn’t get it at first (she’s a traditional red-and-green gal), but even she admits there’s something magical about how it all comes together.
Let me break down the key elements that I’ve learned are non-negotiable for authentic boho holiday style:
Natural Materials (the foundation):
The layering game is crucial, y’all. I learned this after my first “flat” attempt at boho decor. You want to mix:
Speaking of mixing things up, let’s talk about that global influence piece. This is where boho Christmas really stands out from traditional decor. I incorporate:
The biggest difference from traditional Christmas decorating? Boho style embraces imperfection. Your tree shouldn’t look like it was decorated by elves with rulers and matching ornament sets. Mine has everything from vintage brass bells to handwoven wall hangings I’ve repurposed as decorations.
Here’s my tried-and-true formula for mixing vintage and modern elements:
One thing that totally surprised me? The power of negative space. Unlike traditional Christmas decor where more is more, boho style actually needs some breathing room. I used to pack every inch of my tree, but now I know better – letting some areas remain sparse creates this amazing visual rhythm.
The vintage element is super important, but here’s the trick – you don’t want your space looking like a time capsule. I combine old and new by:
Let’s talk about what boho Christmas isn’t (because this confused me for ages):
The most liberating thing about bohemian holiday style? There’s no rulebook. While there are certain elements that help create that boho vibe, the interpretation is totally personal. My version of boho Christmas probably looks different from yours, and that’s exactly how it should be.
The key to nailing this style is understanding that true bohemian Christmas decor should feel like it evolved naturally over time. If everything in your display is brand new and matching, you’re missing the point. It’s about creating this beautiful, collected feeling that reflects your personality and experiences.
Remember, authentic boho style tells a story – your story. Don’t get too caught up in what you’re seeing on Instagram or Pinterest. The most successful bohemian holiday spaces I’ve seen are the ones that feel genuine to the people who live there.
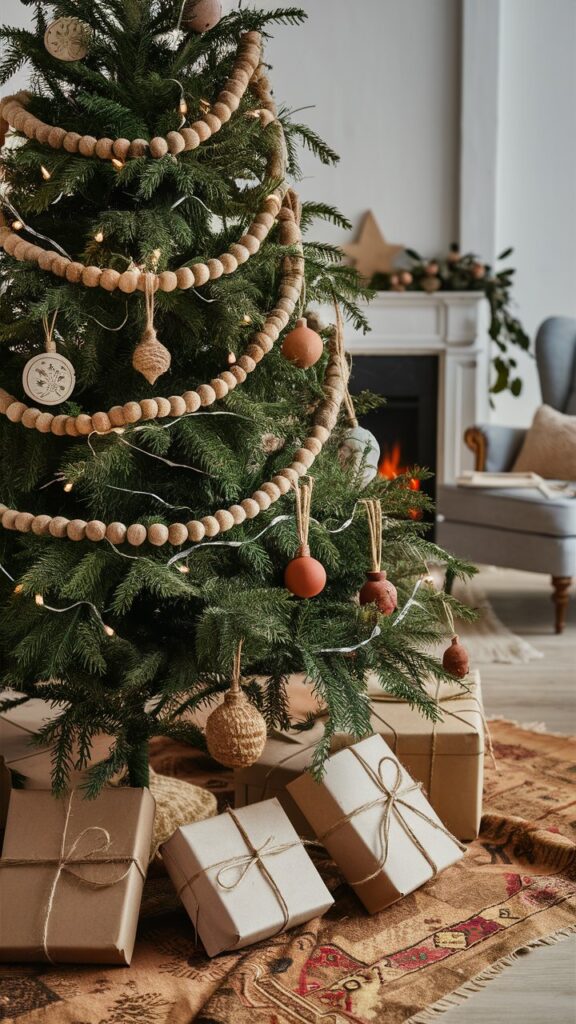
I’ve got to tell you – my first attempt at decorating a boho Christmas tree was a total disaster! I had just discovered bohemian style on Pinterest and thought, “Hey, I’ll just throw some macramé on there and call it a day.” Oh boy, was I wrong. But after years of perfecting the art of boho Christmas trees (and learning from quite a few creative mishaps), I’ve figured out exactly what makes these free-spirited beauties work.
Let’s start with the foundation – your tree topper. Forget those traditional stars and angels for a minute. One of my absolute favorite tricks is using a vintage-inspired dreamcatcher as a tree topper. I discovered this by accident when my regular topper broke the night before hosting Christmas dinner! The dreamcatcher created this magical bohemian vibe that had everyone asking how I came up with the idea.
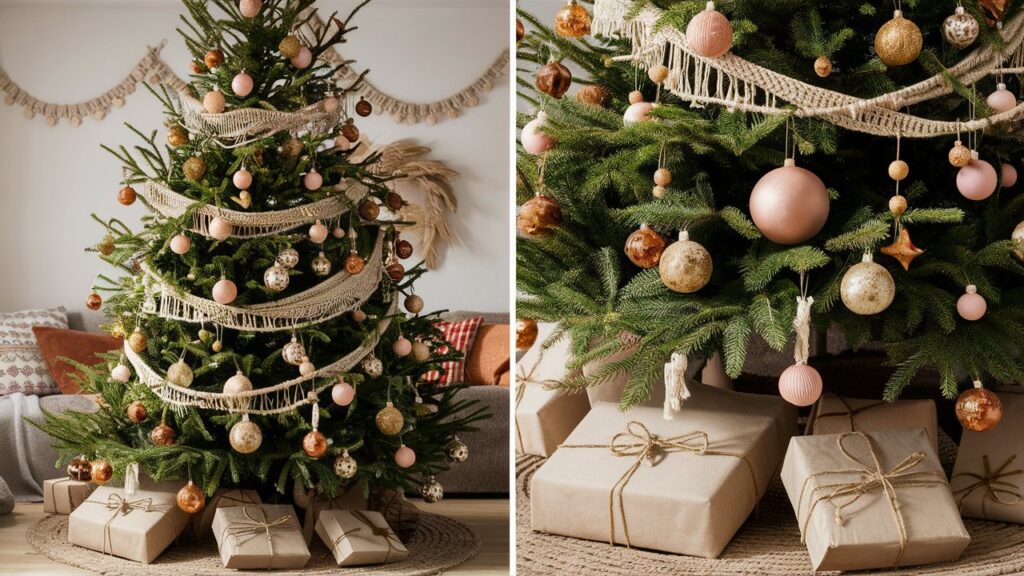
When it comes to the actual ornaments, think layers and texture – lots of texture! I always start with a base of natural elements. Think wooden beads (those chunky ones work amazing), dried orange slices, and cinnamon sticks. Pro tip: start drying your orange slices in October so they’re ready for decorating season. I learned that one the hard way after trying to rush-dry them with a food dehydrator… let’s just say the smell wasn’t very festive!
You might like: Boho Rag Ball Ornaments | Easy DIY Project
The middle layer is where you can really have fun with the boho vibe. I weave in elements like:
Here’s something most people don’t tell you – pampas grass makes an incredible garland! But you’ve got to spray it with hairspray first to prevent shedding. Trust me on this one – I spent an entire evening vacuuming up pampas grass fluff before figuring that out.
For the outer layer, I focus on adding sparkle and movement. Vintage brass bells are absolutely perfect for this. I found a whole box at a thrift store for $3 last year – total score! Mix these with some crystal prisms and mercury glass ornaments. The way they catch the light adds this magical dimension that takes your tree from “nice” to “wow!”
Color palette is crucial for a boho Christmas tree. I stick to a mix of neutrals (cream, beige, white) with touches of metallic and maybe one or two accent colors. Last year, I used deep terra cotta as my accent, and it looked absolutely stunning against all the neutral elements.
One mistake I see people make is forgetting about the tree skirt. A regular tree skirt just won’t cut it for a boho tree! Try layering a few vintage Moroccan rugs, or even a beautiful woven basket as a tree collar. I actually use an oversized macramé throw that I found at a yard sale – it adds that perfect finishing touch.
Don’t forget about lighting! Regular white lights are fine, but try weaving in some copper wire fairy lights too. They create this warm, magical glow that really brings out all those natural elements. Just make sure to spread them evenly – I once bunched all mine in the front and… well, let’s just say the photos from that year are pretty funny!
Remember, creating a boho Christmas tree is all about embracing imperfection and letting your creativity flow. There’s no such thing as “too much texture” when it comes to boho style. Well, okay, maybe there is – but that’s half the fun of figuring it out!
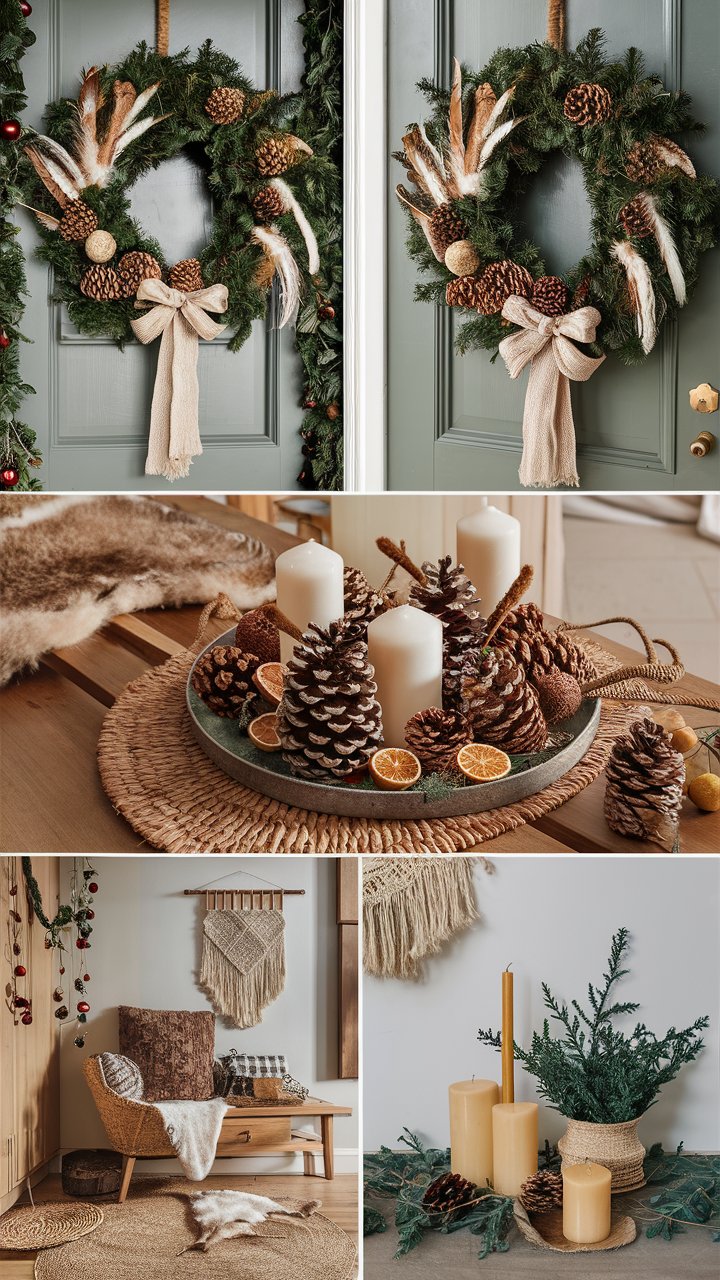
You know what’s funny? I used to think creating those picture-perfect boho holiday vignettes was some kind of mystical art form. Like seriously, how did everyone on Instagram make their little holiday corners look so effortlessly cool? After countless attempts (and honestly, some pretty awkward arrangements), I’ve finally cracked the code to creating these magical little spaces.
Let me tell you about my first attempt at a holiday vignette – I literally just piled some throw pillows next to a plant and called it a day. Spoiler alert: it didn’t quite capture that cozy boho holiday magic I was going for! But through lots of trial and error (and way too many trips to thrift stores), I’ve learned that creating these dreamy little corners is actually pretty straightforward once you know the basics.
Let’s start with what I call the “ground game” – floor pillows and poufs are absolute game-changers for holiday gatherings. Here’s my tried-and-true formula: start with two large floor pillows (preferably in different textures), add a moroccan pouf, and then scatter 2-3 smaller cushions in coordinating colors. The key is varying the heights – I arrange them in what I call a “cascade effect,” where they sort of flow from tallest to shortest.
For shelving arrangements (which totally stumped me at first), I’ve developed this simple rule of three:
Speaking of brass elements – thrift stores are your best friend here! I’ve found some absolute treasures for creating that warm, vintage vibe. Mix different heights of brass candlesticks (at least 3-5 for impact) with some modern elements like geometric terrariums. Pro tip: spray your brass pieces with clear coat after cleaning them – keeps them shiny throughout the season without constant polishing.
Now, let’s talk about lighting because this is where I see a lot of people missing out on major cozy potential. Regular string lights are fine, but copper wire fairy lights are where it’s at! I weave them through dried flowers and around crystals to create these gorgeous little light pools. And please, please invest in some good quality beeswax candles – they give off this warm honey glow that no LED can match.
Here’s something most people don’t think about: scent layering for your vignettes. I keep a small ceramic diffuser (in an earthy tone, of course) near my holiday displays with a blend of cedar, orange, and cinnamon oils. It adds this invisible but crucial layer to the whole cozy vibe.
For the actual styling process, I use what I call the “triangle method.” Start with your tallest element (maybe a vase with dried pampas grass), then create a triangle with two shorter pieces (like brass candlesticks or crystal clusters). Fill in the gaps with smaller items like pine cones or air plants. This approach has saved me from so many cluttered-looking arrangements!
One of my favorite tricks is creating what I call “altar-style” displays on console tables. Start with a vintage mirror as your backdrop, then layer elements in front: a mix of pillar candles, crystal points, dried botanicals, and maybe a small macramé wall hanging off to one side. The mirror reflects the candlelight and creates this absolutely magical effect.
Don’t forget about textiles! Layer different textures like a chunky knit runner with a vintage kilim mat underneath. I learned this the hard way – flat surfaces need layers just like everything else in boho style. And please, mix your metals! Brass, copper, and silver all play beautifully together in holiday vignettes.
Remember, the goal isn’t perfection – it’s creating a space that feels lived-in and loved. Some of my favorite vignettes came together when I stopped overthinking and just let the elements find their natural place. Trust your instincts, and don’t be afraid to move things around until it feels just right.
Oh boy, let me tell you about my journey into DIY boho Christmas projects! I still remember staring at a pile of orange slices, twine, and dried flowers, wondering how on earth I was going to transform them into something Pinterest-worthy. After countless hot glue gun burns (seriously, I should have bought stock in Band-Aids) and some pretty interesting “learning experiences,” I’ve got some foolproof projects to share.
Let’s start with what I consider the gateway to boho Christmas crafts – dried orange garlands. Here’s what no one tells you: not all oranges are created equal! You want to use navel oranges sliced about 1/4 inch thick. I learned this after trying to dry some tiny mandarin oranges that shriveled up to nothing. Set your oven to 170°F (or the lowest setting), and plan for about 4-6 hours of drying time. Pro tip: place them on parchment paper, not directly on the rack – trust me on this one!
My absolute favorite project has to be macramé ornaments. I started with basic ones using natural cotton cord (3mm thickness works best), and now I’m addicted! Here’s my simple formula for beginners:
Speaking of wreaths – can we talk about how expensive boho wreaths are in stores? My first DIY wreath was kind of a happy accident when I found a grape vine wreath base at a thrift store for $2. Now I make them all the time using:
Here’s something that took me way too long to figure out – you need to build your wreath in layers, starting with the largest elements first. And always, always make it fuller than you think it needs to be. Trust me, once it’s hanging on your door, you’ll be glad you added that extra bunch of dried flowers!
Let’s talk about gift wrapping, because this is where you can really let your boho creativity shine! I ditched traditional wrapping paper years ago. Instead, I use:
The key to boho gift wrap is thinking in layers, just like with the wreaths. Start with your basic wrap, add a band of woven ribbon or trim, then build up your decorative elements. I keep a “gift wrap box” where I collect little bits and pieces throughout the year – vintage buttons, small dried flowers, pieces of lace.
One of my favorite quick projects is making crystal ornaments. All you need is:
Just remove the top, add your elements in layers (moss first, then crystals, then carefully thread in the lights), and voila! These look absolutely magical on the tree, especially when the lights catch the crystals.
Oh, and here’s a money-saving tip I wish I’d known earlier – start collecting your materials months in advance. Those dried flowers and pampas grass? Way cheaper if you dry them yourself in late summer. And always check craft stores right after Christmas for clearance supplies you can use next year.
Remember, the beauty of boho style is that it’s perfectly imperfect. Some of my favorite pieces are the ones that didn’t turn out exactly as planned but have their own unique charm. And please, don’t get discouraged if your first attempts don’t look exactly like the inspiration photos – mine sure didn’t! It’s all about experimenting and finding what works for you.
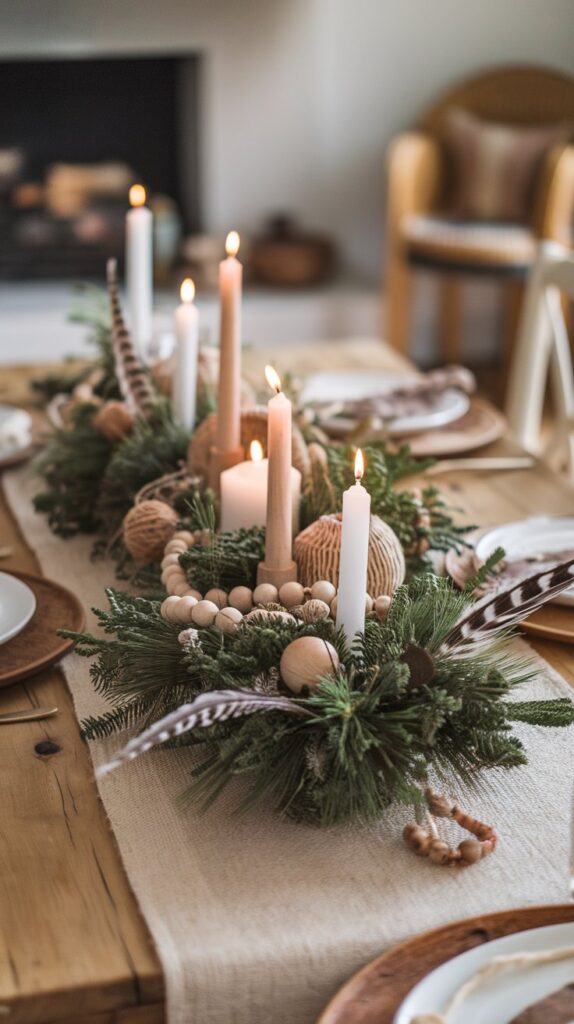
Let me tell you, my journey with boho holiday table settings has been quite the adventure! My first attempt looked like a craft store had exploded on my dining table – there was just way too much going on. But after years of hosting gatherings (and learning what actually works), I’ve figured out how to create those dreamy tablescapes that are both beautiful and functional.
Here’s something nobody tells you about table settings – start with your base layers at least a day before your gathering. I learned this the hard way after trying to set up everything an hour before guests arrived. Talk about stress! Now I always begin with a vintage linen tablecloth as my foundation. Pro tip: if you can’t find the perfect tablecloth, large pieces of natural linen fabric from the craft store work beautifully and are usually way cheaper!
Let’s talk about layering because this is where the magic happens. My tried-and-true formula is:
The key is mixing textures while keeping your color palette controlled. I stick to no more than 3-4 colors total. My favorite combination is cream, terra cotta, and sage green, with touches of brass for sparkle.
Now, let’s discuss centerpieces because this is where I see a lot of people struggle. Here’s what I’ve learned: you need varying heights, but nothing so tall that guests can’t see each other! I create what I call “centerpiece stations” down the table:
Speaking of crystals – they’re gorgeous on a holiday table, but please make sure they’re secure! I once had a rose quartz cluster roll right into someone’s soup. Now I use a tiny dot of museum putty under each one. Works like a charm!
For place settings, I love creating individual “gift bundles” at each spot. I tie together:
Let’s talk about glassware because this is where you can really have fun! I mix vintage amber glasses with modern crystal wine glasses. The combination of old and new creates such interesting visual texture. And don’t worry about everything matching perfectly – that’s the beauty of boho style!
One game-changer I discovered was using vintage brass candlesticks of different heights. But here’s the trick – group them in odd numbers (3, 5, or 7) and make sure you use dripless candles! Nothing ruins a beautiful tablescape quite like wax drips on your linens. I learned that one the hard way!
For napkin rings, skip the store-bought ones. Instead, try:
Here’s something that took me forever to figure out – you need empty space too! I used to try to fill every inch of the table, but it ended up looking cluttered. Now I make sure to leave some breathing room between my “centerpiece stations.” It makes everything look more intentional and elegant.
And please, don’t forget about practicality! Make sure to leave space for serving dishes and water pitchers. I once created this gorgeous tablescape that looked amazing but left no room for the actual food – not my finest hosting moment!
Remember, the goal is to create a warm, inviting space where people want to linger and connect. Some of my favorite holiday memories are from long dinners at beautifully set tables, but what made them special wasn’t just the décor – it was how it made everyone feel welcome and comfortable. That’s the real magic of boho holiday styling!
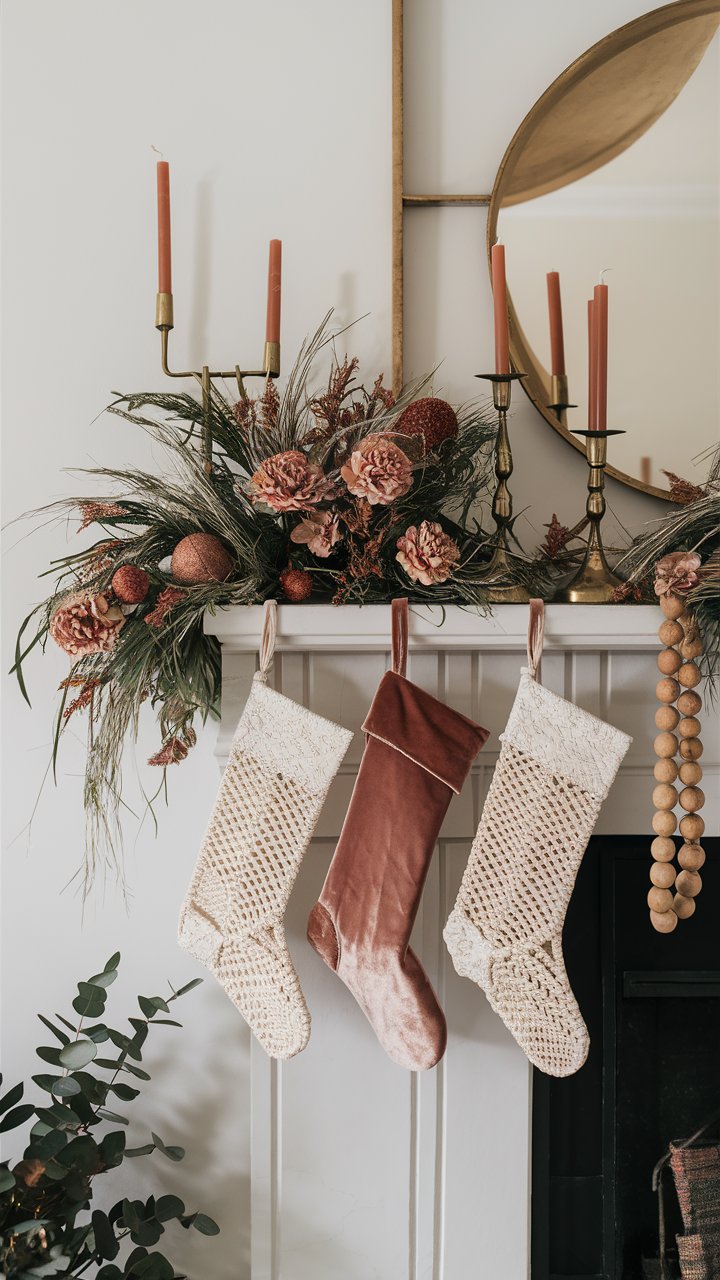
You know what’s funny? I used to think incorporating natural elements meant just plopping a pine cone on the mantel and calling it a day. Oh, how wrong I was! After years of experimenting (and yes, making plenty of mistakes), I’ve discovered that using natural elements in boho holiday decor is like conducting a beautiful symphony of textures and forms.
Let me start with my absolute obsession: pampas grass. The first time I tried decorating with it, I had fluff everywhere – it looked like it had snowed in my living room! Here’s what I’ve learned: before you do anything with pampas grass, give it a good spritz with hairspray. This keeps the shedding under control while maintaining that gorgeous, fluffy texture. I create tall arrangements using:
Speaking of dried flowers, let’s talk about preserving them because this changed my whole decorating game. I dry my own flowers starting in late summer (way cheaper than buying them!). My favorite combinations include:
Now, about those pinecones – there’s actually a right way to prepare them! First time I brought pinecones straight in from outside, I ended up with bugs in my holiday decor (not exactly the vibe I was going for!). Here’s my tried-and-true method:
Crystal and geode incorporation was something I really had to figure out through trial and error. The key is treating them like jewelry for your space – use them as accent pieces, not the main show. I keep collections of:
Let’s talk about my favorite discovery: woven baskets as decor elements! I have what my family lovingly calls my “basket wall” where I display different sizes and weaves. During the holidays, I fill them with:
Here’s something that took me way too long to figure out – you need to vary your textures when using natural elements. I follow what I call the “touch test” – each vignette should have something smooth, something rough, something soft, and something sparkly.
One of my favorite tricks is creating dried herb bundles. They look beautiful and make everything smell amazing! I combine:
Can we talk about branches for a minute? After nearly poking my eye out with a poorly placed branch arrangement, I learned some things. First, strip off any dead or fragile parts. Then, arrange them in a tall vase filled with rocks for stability. I love using:
The secret to making natural elements look intentional rather than just scattered around is grouping them in odd numbers. Three pinecones look designed; four look random. Five crystal clusters create impact; six just looks cluttered.
And here’s my number one tip for success with natural elements: start collecting early! I begin gathering and drying materials in late summer for the holiday season. This gives everything time to properly dry and cure, plus it’s so much more budget-friendly than buying everything pre-dried.
Remember, incorporating natural elements isn’t about perfection – it’s about creating a space that feels connected to the earth and the season. Some of my favorite arrangements happened when I let go of strict planning and just let the materials speak for themselves. Nature isn’t perfect, and that’s exactly what makes it beautiful in our holiday decor!
Here’s my tried-and-true formula for creating a boho Christmas color scheme that actually works:
Base colors (pick 2-3):
Accent colors (choose 1-2):
The biggest mistake I see people make? Trying to include every boho color under the sun. Trust me, I’ve been there! But I’ve learned that limiting yourself to 4-5 colors max creates this sophisticated look that feels intentional rather than chaotic.
Temperature is super important too. I try to stick with either all warm tones (think terracotta, burgundy, gold) or all cool tones (like dusty blue, sage, silver). The year I mixed warm and cool colors… well, let’s just say my living room looked more confused than bohemian.
Finding Your Boho Holiday Style Without Breaking the Bank (I Promise It’s Possible!)
Can we talk about the elephant in the room? When I first fell in love with bohemian holiday decor, my Pinterest boards were full of $200 macramé tree skirts and $50 artisanal ornaments. My wallet was like, “Um, absolutely not.” After some serious trial and error (and yes, a few craft fails), I’ve figured out how to create that perfect boho Christmas vibe without maxing out my credit cards.
Let me tell you about my biggest money-saving revelation: thrift stores in wealthy neighborhoods. I know it sounds specific, but hear me out. Last year, I scored a whole box of copper and gold ornaments for $8 because someone had decided to change their color scheme. Their loss, my gorgeous bohemian gain!
Natural elements are literally your best friend when decorating on a budget. I spend exactly zero dollars collecting pinecones, branches, and dried leaves from my neighborhood. A quick wash, maybe a light dusting of gold spray paint (which costs like $5 and lasts forever), and boom – instant boho decor that looks expensive.
Here’s my tried-and-tested list of budget-friendly boho holiday decorating tricks:
DIY Projects (under $20):
Thrifting strategy (what to look for):
Listen, I totally messed up my first attempt at budget boho decor. I bought everything new from the craft store and still ended up with a look that screamed “I tried to be fancy but ran out of money.” Now I know better – mixing high and low pieces is the secret sauce.
The absolute game-changer was learning to see potential in everyday items. You know those plain brown paper bags from the grocery store? Cut them into strips, twist them slightly, and you’ve got the most amazing rustic garland. Cost: literally pennies. Impact: totally Pinterest-worthy.
One thing that surprised me? The dollar store actually has some hidden gems. Their glass candleholders, when grouped together with some twine wrapped around them, look just like the expensive bohemian versions I’ve seen in fancy catalogs. And don’t even get me started on their basic ornaments – a little chalk paint and they’re transformed.
Here’s my monthly breakdown for building a boho holiday collection without going broke:
Pro tip: Never buy ribbon at full price! The craft stores mark it down to 70% off several times during the holiday season. I stock up then and store it with my other decorations. Same goes for basic ornaments – they’ll always go on sale.
Want to know my number one money-saving secret? I pick a “star” piece each year – something a bit more special that I’m willing to spend maybe $30-40 on. Everything else is either thrifted, DIYed, or natural. This way, my collection grows slowly with quality pieces, but I’m not dropping hundreds of dollars at once.
Remember folks, authentic boho style is supposed to look collected and eclectic. If everything matches perfectly, you’re probably doing it wrong (and spending too much money). Embrace the imperfections – they’re what make your space feel real and lived-in rather than like a catalog photo.
Creating a boho Christmas wonderland is all about expressing your unique style while embracing the magic of the season! Remember, there’s no “right” way to do boho – it’s about following your intuition and creating a space that feels authentically you. Start collecting your natural elements early, mix in some handmade touches, and watch your bohemian holiday vision come to life. Ready to start your boho Christmas journey? Pick one project from our guide and let your creativity flow!
Please note: This website contains affiliate links. As an Amazon Associate, we earn from qualifying purchases at no additional cost to you.
.
Share this article via:

This website uses cookies to ensure you get the best experience on our website. View our Privacy Policy here.